Firstly have to thank cycloneranger (Jeff) for parting company with enough bits to get the ball rolling. I now have frame, engine chassis,swinger with shock front yokes with forks with clipons, wheels with discs front and rear calipers. An engine has been fortunately sourced. Now the major quandary is do i return it to stock or have a serious tinker. I suspect as with with most projects that this will take a while and be dependant on me hiding the funds for it from the mrs, although in fairness she seems happy for me to do this.
As and when i get round to doing things i will post pics.... hopefully the pics wont show too much swearing
And so the fun begins
Moderators: trixynut, Mincehead, dicky, phuk72, Jak, Kevtrx849
-
ac@39
- Site Sponsor
- Posts: 162
- Joined: Tue Sep 10, 2013 7:57 pm
- Location: Neath - South Wales
And so the fun begins
You do not have the required permissions to view the files attached to this post.
inspired by san miguel
-
phuk72
- Site Sponsor / Administrator
- Posts: 3522
- Joined: Thu Jan 06, 2005 1:47 pm

-
trixynut

- Site Sponsor
- Posts: 2572
- Joined: Fri Sep 22, 2006 3:48 pm
- Location: Leicester, England
Re: And so the fun begins
Looks fine as it is to me......

-
ac@39
- Site Sponsor
- Posts: 162
- Joined: Tue Sep 10, 2013 7:57 pm
- Location: Neath - South Wales
Re: And so the fun begins
well time in man cave has resulted in engine in frame cleaned carbs attached all necessary wiring in place and a charged battery ... pressed the button and bugger all .. zip .. diddly squat .... bypass the starter relay and we got our first turn over of the motor so not the end of the world .... hours later and finally discover a broken wire, so a temp repair
whey hey .. temp repair done and we have turn over on the button ..
so rig up little make shift to get some fuel in the carbs .. all i want is to hear her run .. go through the gears .. and move on to what i what i'd like to do... currently she looks like this
anyway fuel is in .. choke on .... press the all important button .... potato potato potato potato could've sworn i had a small flash ... and bugger me the carbs are peeing petrol all over the place.. soak up fuel and recklessly continue ,,, but to no avail... all said and done though i have only 1 working coil (secondary resistance is 0) ... was kinda hoping to get her going on 1...so back to the carbs and at least get them to hold fuel
onwards and upwards
have sourced a mille swing arm ... dunno bout front yet but would love to get a panigale 1199 rear end on.. early days yet
You do not have the required permissions to view the files attached to this post.
inspired by san miguel
-
ac@39
- Site Sponsor
- Posts: 162
- Joined: Tue Sep 10, 2013 7:57 pm
- Location: Neath - South Wales
Re: And so the fun begins
well thanks to cobbadiggabuddyblooo engine is now running. well impressed as fired on second push of button, if all to be believed from seller has sat in garage for 3/4 years. gonna put rad/down pipes on.. bring her up to temp and see what leaks out of where. still havent sorted the clutch side of things as even though all there and put together correctly pressure at clutch actuator lever is pants as can still pull by one finger. will start engine and maybe just try jab her into gear see if it puts things right.. who knows..
inspired by san miguel
-
ac@39
- Site Sponsor
- Posts: 162
- Joined: Tue Sep 10, 2013 7:57 pm
- Location: Neath - South Wales
Re: And so the fun begins
Decided to do an aprilia swing arm conversion, from an 03 Tuono so both swing arms are with a local custom bike builder, he's going do a bit of cutting and shutting of swing arms, so will have original Trx tube that holds the bearings and swing arm spindle welded onto the prilla swing arm and he's going to attempt to cut the block from the trx arm that you bolt the dog bones to and weld it onto the prilla arm. Quite how this will affect ride height as the underneath of prilla swing arm isn't flat so a bit of fabrication is going to be required to make things sit right. Suppose ultimately i will have to mess around with different length dog bones but that's a long way off. As i'm in no hurry he said would be a few weeks .. so will post pic when it gets back ,, as he has a garage full of top spec harley customs he seemed quite interested/bemused as to where this may end up. Got some quality work on show so have every faith will be good.
inspired by san miguel
-
ac@39
- Site Sponsor
- Posts: 162
- Joined: Tue Sep 10, 2013 7:57 pm
- Location: Neath - South Wales
Re: And so the fun begins
finally got round to bolting together a few of the mods done ... which has created an issue but hey ho .. onwards and upwards
i have the swing arm from a tuono 03 thats been a bit modded
i have the swing arm from a tuono 03 thats been a bit modded
You do not have the required permissions to view the files attached to this post.
inspired by san miguel
-
ac@39
- Site Sponsor
- Posts: 162
- Joined: Tue Sep 10, 2013 7:57 pm
- Location: Neath - South Wales
Re: And so the fun begins
modded swingarm slotted straight in .. so all good at this stage with long term ride height queries,, have decided to use a zx10r 09 rear shock .. as all is an unknown at this stage ...and as the front end i will use is going to be shorter, the loss of length on rear shock will help to compensate.
so the shock is in
however as the next pic shows there is a small clearance issue .. longer dogbones i think will sort it but have a preference for changing the linkage to gain the clearance.. if all else fails will have to look at more mods to the swing arm, but not too keen on that idea at present.
moving forward .. will try a linkage from yzf750 first for the clearance ...
as for the front have picked up a mille front end ..showa forks brembo front wheel with discs and calipers (couldnt resist as was a bargain)..lots to do and dwindling funds ... hey ho was never gonna be done overnight
You do not have the required permissions to view the files attached to this post.
inspired by san miguel
-
ac@39
- Site Sponsor
- Posts: 162
- Joined: Tue Sep 10, 2013 7:57 pm
- Location: Neath - South Wales
Re: And so the fun begins
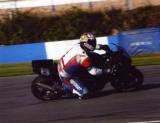
anyhow .. despite issues .. this is where i'm going with the look so far
You do not have the required permissions to view the files attached to this post.
inspired by san miguel
-
ac@39
- Site Sponsor
- Posts: 162
- Joined: Tue Sep 10, 2013 7:57 pm
- Location: Neath - South Wales
Re: And so the fun begins
have had some cave time and have estimated final front end height .. and have suspended bike to reflect this.. still all theory as no load on forks and rear shock but gives an idea... since last post have acquired a yzf 750 shock linkage and this definitely doesn't work with what i have done so far done (not yet sourced lower yoke and upper and had stem pressed out/in ).. shock went from touching rear of swing arm to touching the tube the spindle goes through, and this was done using the spare hole to the rear of where the linkage is usually sited.(anyone need/want yzf 750 linkage pm me) .. so onwards and upwards ,, disengaged linkage and sought out at what ride height the shock was central in the swing arm and how much room either side to feel comfortable with to allow for wheel travel.. suffice to say bike will be considerably lowered compared to standard... will need to source/make dog bones between 205 - 215 .. could probably stretch it a bit further but until loaded all pie in the sky.. giving estimated seat heights around 755 -775 mm.. if anyone reading this has done similar mod would be interested to hear where you ended up?
inspired by san miguel
-
ac@39
- Site Sponsor
- Posts: 162
- Joined: Tue Sep 10, 2013 7:57 pm
- Location: Neath - South Wales
Re: And so the fun begins
pie in sky is exactly how things have turned out... have had an aprilia lower yoke fitted with trx stem and top yoke modded to fit. and if i can get photo bucket to work this is how she looks

at this stage i had to go for 210 eye to eye dog bones which has given a rough ride height of 760mm
so with that in mind i decided to load things up a bit and pop the engine in

hahaha ... just got myself a low rider.. rough ride height dropped a further 20mm to approx 740and the side stand was just about usable. and looks like i'll be having to look again at dogbone lengths...so back off to man cave for a play.. unbolt top shock mount and then jacked the rear.. well more like suspended ..
untill i can get something temporary made up and have a play the next 2 photos show that i need to roughly lower top shock mount by 40mm in order to give a rough seat height of 810


so far so good and things looking ok to me, never having done this before am loving it ..whether it ends up rideable is another matter, what i did discover but havent yet measured is that the mod i had done to the swing arm has shortened it slightly (which i'm not too pleased about , but it's done so no point bitchin), which only became apparent when i got the chain runner guide , this has caused the issues with the dogbone lengths and lack of space to work with. My only options it would appear is to decide how long the top mount spacer should be and then set dog bone length so that the shock spring is central in the swing arm space i have, thus allowing for wheel travel and not have the shock spring impeded. Anybody else who decides to do this mod should also be wary of which swing arm they buy .. mine was stamped 03 and turned out to be gen 2 recall item. This means that inside the swingarm .. sprocket side it has 2 rivets .. and was a recall as prone to crack at the lower rivet .. this i didnt find out till i tried to source swing arm furniture .. however i did speak to a (unamed) aprillia dealer who said yes they were recall and yes he had changed loads .. but had never seen a cracked one ... go on the aprilia forum and loads of cracked ones... unamed dealer ran one on a race bike and welded the the rivet over ..so i'll continue and after every ride will inspect .. if i need to redo the mod with the updated swing arm .. so be it.
onwards and upwards i had a look and the offeset sprocket i would be needing and here i may need a bit of advice ... every change so far at rear end has had dramatic effects... next photo shows that there is a 3mm mis alignment.. so would this actually translate into a 3mm offset at the front sprocket??

inspired by san miguel
-
cobbadiggabuddyblooo
- Site Sponsor
- Posts: 6809
- Joined: Thu Aug 28, 2008 9:19 am
- Location: Brisbane,Australia
Re: And so the fun begins
How close to centre are the wheels themselves????
Maybe you can use one of Kaylas shock adaptors to get the correct ride height??
I might suggest to Do a little homework on a sprocket site.
They have all the coding for the spline sizes and there are quite a number of bikes with the same size shaft and pattern as the trx.
You may find one with a little more offset than the trx.
May take a few hrs trolling through bikes but that's how I hound the 520 set up for the trx.
Maybe there is an offset rear you can use that fits the Apprilia rear as I found a Honda rear fitted the trx 520 and Suzuki front 520.
Can you use a washer to get the correct offset behind the rear sprocket??
laughter is the best medicine
-
Trixed
- TRX-Enthusiast
- Posts: 341
- Joined: Sat Jan 26, 2013 4:07 am
- Location: Brisbane Aus
Re: And so the fun begins
I used a washer for the Sachs 250 conversion to 520 and have had no issues at all.
It is time to rev your hearts!
-
ac@39
- Site Sponsor
- Posts: 162
- Joined: Tue Sep 10, 2013 7:57 pm
- Location: Neath - South Wales
Re: And so the fun begins
Been busy the past few months so thought i'd show where i've got to so far. Loads left to do, obviously but getting there as funds permit. Currently with an rsv front end with a tuono top yoke conversion, rsv radial front master cylinder. R6 rearsets and a tuono swing arm. zx10r (09) rear shock. seems can only add 3 pics so st will follow
You do not have the required permissions to view the files attached to this post.
inspired by san miguel
-
ac@39
- Site Sponsor
- Posts: 162
- Joined: Tue Sep 10, 2013 7:57 pm
- Location: Neath - South Wales
Re: And so the fun begins
You do not have the required permissions to view the files attached to this post.
inspired by san miguel