What did you do today? Cobba's rebuild

General Discussion Forum for TRX Enthusiasts...

Moderators: trixynut, Mincehead, dicky, phuk72, Jak, Kevtrx849

Post Reply
cobbadiggabuddyblooo
Site Sponsor
Posts: 6809
Joined: Thu Aug 28, 2008 9:19 am
Location: Brisbane,Australia

Re: What did you do today? Cobba's rebuild

Post by cobbadiggabuddyblooo » Wed Nov 12, 2014 11:40 am

:lol: :lol: :lol: Janet said those exact same words when pulling up my pants this morning.
Thanks for the input guys, the comments and advice are always appreciated.
Brett dropped off both clutch and rotor tools which look simple and easy to make if you have a welder.
At least after tomorrow I'll be at top end rebuild stage.
Copper head gasket should be completed by the weekend so I'm half way there.
laughter is the best medicine

User avatar
Tarwetijger
TRX-Enthusiast
Posts: 1537
Joined: Tue May 15, 2007 9:31 am
Location: Netherlands, Assen
Contact:

Re: What did you do today? Cobba's rebuild

Post by Tarwetijger » Wed Nov 12, 2014 4:22 pm

I have the same clutch, from Misterdimwiddy.
Although I never got it to actually slip, even on a track day! :oops:
I am just too gentle for my bike. :D

cobbadiggabuddyblooo
Site Sponsor
Posts: 6809
Joined: Thu Aug 28, 2008 9:19 am
Location: Brisbane,Australia

Re: What did you do today? Cobba's rebuild

Post by cobbadiggabuddyblooo » Thu Nov 13, 2014 10:38 am

Hey Robert,
Did you get the clutch in the original box and with the disc that is supplied ???
There should be some Grey spring pre load spacers too in amongst it as well as the red ones.
(you can see them in a small packet in the photo on the previous page of the clutch out of the box)
I measured up between the red and grey pre load spacers and there is nearly 2mm difference and I'll confirm over the next couple of days if the grey was the lower pre load which you may need to try.

Much like your rear suspension, more pre load will raise the ride height but it still compresses the same amount with torque applied just with a little more travel till it tops out or slips in this case.

So you spring the clutch to weight of power applied much like your rear suspension.
More weight you go for a heavier spring and same with the clutch, more power heavier spring may be needed.
So if you have the std TRX springs in the slipper clutch and they are holding the torque applied by the motor on acceleration then the pre load adjusters may be the answer.
If a number or all the springs have been changed to a heavier spring ,start back with the std springs as your base point... :wink:
laughter is the best medicine

User avatar
Tarwetijger
TRX-Enthusiast
Posts: 1537
Joined: Tue May 15, 2007 9:31 am
Location: Netherlands, Assen
Contact:

Re: What did you do today? Cobba's rebuild

Post by Tarwetijger » Thu Nov 13, 2014 10:48 am

Yes I got all the stuff that it came with.
I think I have the grey spacers in, might have to check to be sure.
I securely followed the instructions and it worked well in Misters' bike.
On the other hand, I've never locked or skidded the rear wheel with downshifting or anything like that.
So, it could work well but my riding might not be extreme enough to activate it.
I am not complaining as I got a personal best lap 4 seconds faster on my last trackday.

cobbadiggabuddyblooo
Site Sponsor
Posts: 6809
Joined: Thu Aug 28, 2008 9:19 am
Location: Brisbane,Australia

Re: What did you do today? Cobba's rebuild

Post by cobbadiggabuddyblooo » Thu Nov 13, 2014 10:51 am

Thanks Brett,
Your rotor holder worked a treat and a simple devise if you have a welder on hand.
Image
Just lock the shifter onto the angle iron and rest against the bench and tighten the nut till the magical click at 130NM.

Image

Image

Same with the clutch boss holder, simple, easy and lock the handle against the bench and tighten till you desired torque.
120NM was the advise given by Neil at Sigma for the clutch which is a little more than the 70NM on the Yamaha spec.

Image

Image

NOTE..
The 6 holes on the outer edge by the springs of the top plate is where you take your stack height measurements from.
Last edited by cobbadiggabuddyblooo on Thu Nov 13, 2014 11:31 am, edited 1 time in total.
laughter is the best medicine

cobbadiggabuddyblooo
Site Sponsor
Posts: 6809
Joined: Thu Aug 28, 2008 9:19 am
Location: Brisbane,Australia

Re: What did you do today? Cobba's rebuild

Post by cobbadiggabuddyblooo » Thu Nov 13, 2014 10:58 am

Cool bananas, that's a positive Tarwetijger..
Unloading the back wheel and stress upon the frame I'm sure will give a lot more confidence coming into corners instead of the two forces working against each other... Yer baby...
laughter is the best medicine

cobbadiggabuddyblooo
Site Sponsor
Posts: 6809
Joined: Thu Aug 28, 2008 9:19 am
Location: Brisbane,Australia

Re: What did you do today? Cobba's rebuild

Post by cobbadiggabuddyblooo » Thu Nov 13, 2014 11:19 am

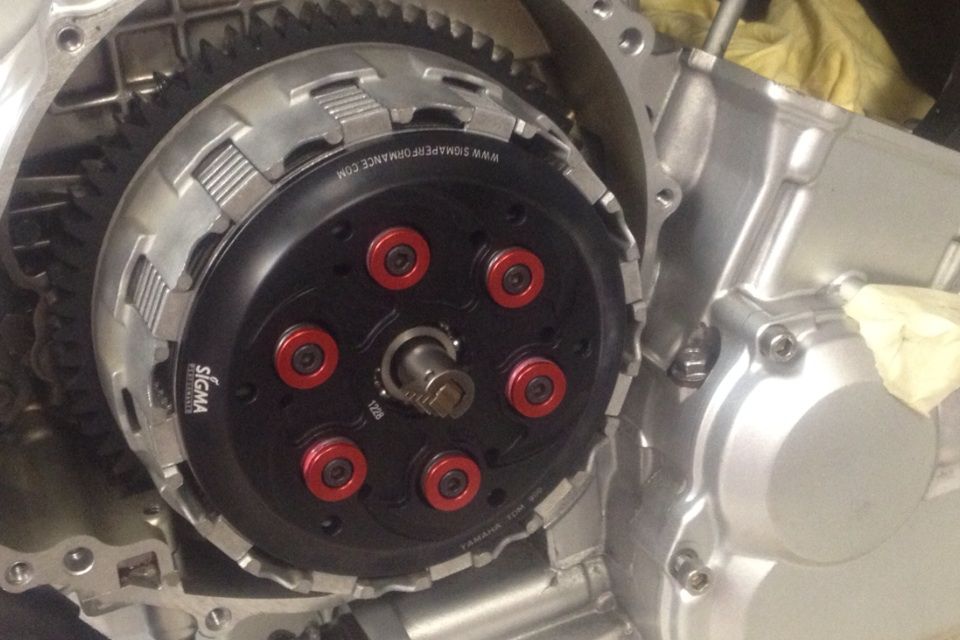
More notes on the SIGMA SLIPPER CLUTCH as reference.

Sigma Slipper Clutch, clearance checking and adjustment.

Clearance.

This procedure is recommended to ensure your clutch is set up correctly. If you use a new standard clutch pack on a clutch assembled correctly on to the bike then you should be able to use the clutch immediately with no additional work necessary to set it up for correct operation.

If you hold the pressure plate up to the light you will see that there are several holes through it that are not required either for the springs or the clutch centre. They are the furthest out from the centre. These holes are clearance checking holes. If you turn the pressure plate over and look at the pressure plate from the ‘back’ you will see they all come out in the groove that takes the clutch centre when the clutch is assembled. We use these holes, together with a depth gauge, to measure how far the centre has to rise when the slipper mechanism is activated.

All clutch metal plates have small notches cut in them. These deliberately destabilize the balance of the clutch plates and help the clutch pack ‘break’ when the lever is pulled in. On assembly make sure the notches are distributed randomly.

This procedure is normally done with the clutch on the bike but if you wish can be done off the bike (our pictures are of a clutch off the bike only for clarity).

1) Before you fit any plates to the clutch, place the pressure plate on to the top of the clutch centre.
2) If you look through the clearance check holes you will see the top edge of the clutch centre.
3) Simply measure the depth of the hole through the pressure plate to the clutch centre. The measurement differs depending on the design of the clutch. Pic a) and Pic b)
4) Assemble the clutch with all the correct plates (check your clutch instructions!) springs and spring collars.
5) Now, simply recheck the depth of the holes. The plate pack should have lifted the pressure plate slightly and the depth of the holes should be slightly greater than before. Pic c)
6) Subtract the first measurement (Para 3 above) from the second (Para 5 above) and you will get the clearance between the centre and the pressure plate A new unworn clutch pack should give a measurement of 1 to 1.2mm (1.5 for big twins) more than before..
7) For general track and other non-competition use the clearance should be between 1.0 and 1.2mm (1.5 for big twins). Check that the clutch and the clutch pack is assembled correctly if the clearance is over 2.0mm with a standard clutch pack. If the clearance is much below 1.0mm your clutch pack is worn and you should consider new friction plates.
8) Different clearances can give different effects. 1.0 to 1.2mm (1.5 for big twins) is ‘normal’. This measurement means the clutch will require little maintenance and will work well in most circumstances.
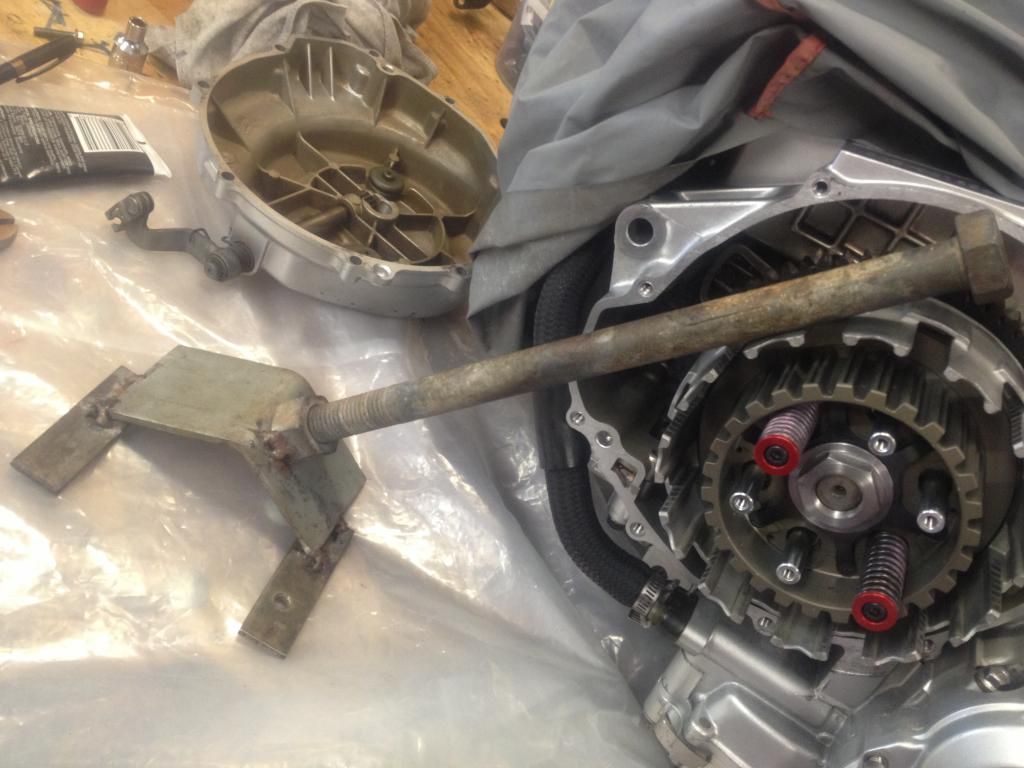
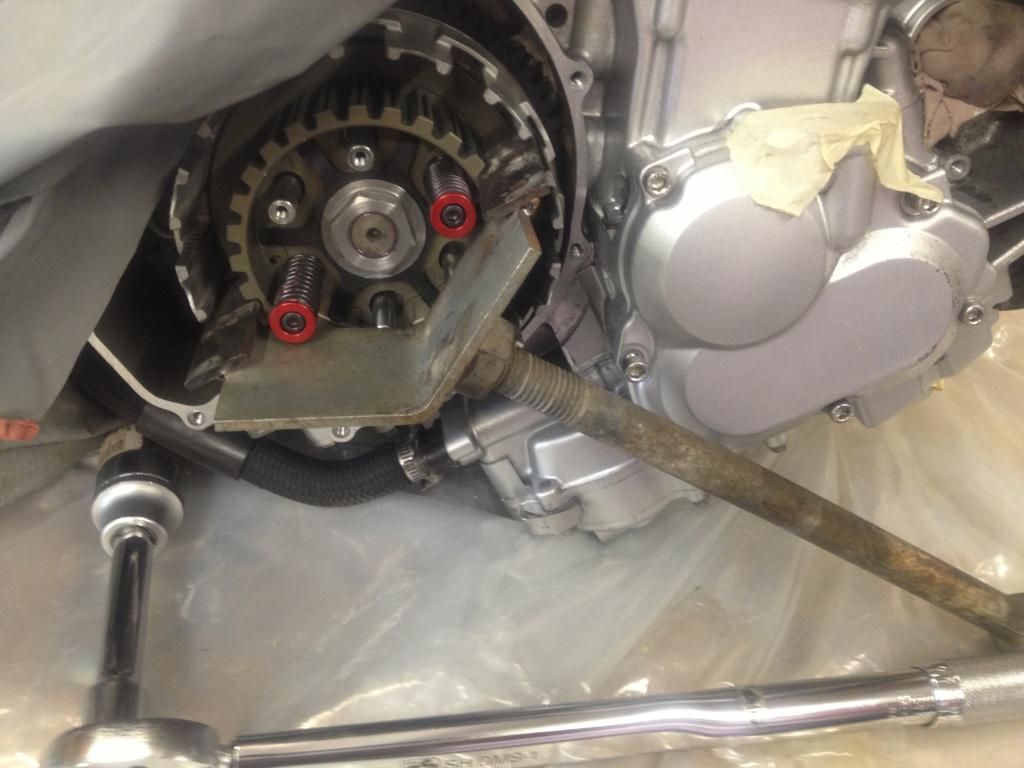
9) We include pictures of several different clutches to show the clearance check hole positions together with a clutch dismantled pic to save you from having to take it apart to see inside!

Changing the amount of engine braking felt through the clutch.

A second adjustment is to change the strength of the main clutch springs or their preload. The stronger the spring rate or the higher the preload the harder the clutch centre has to work to hold the clutch partially disengaged. The effect is to transmit more engine braking through, BUT it gives the plates a much harder time and they will wear out more quickly.

You do not have to change all the springs; you can say have 2 of the relevant manufacturers race kit springs and 3 (or 4 depending on the clutch) street ones, or three race kit springs, or four, the more stiff race kit springs means the more engine braking is transmitted through. Just make sure the race kit springs are distributed opposite each other to equalise their effect. Ensure you only use approved race kit springs from the relevant manufacturer or the correct additional preload collars provided by us. Before use ensure that any springs or preload collars fitted do not coil bind at full lift.

If you do deliberately increase the spring rate or preload for more engine braking feel you must monitor pack wear more closely as the higher loads inside the clutch will increase clutch pack temperatures and wear significantly.

Some times major increases in engine power mean stiffer springs are needed to stop clutch slippage going forward. Things will work far better if the increase in spring rate is just sufficient to handle the extra power. For some bikes we have built clutches with different angle ramps to ensure that stiffer springs do not affect the gentle slip action most top racers prefer.

Remember, all or clutches are designed to function just fine with a new original clutch pack, and new original clutch springs. If you insist on experimentation these numbers are intended to provide a little guidance to competent mechanics. Before you start playing remember that we believe the standard numbers, a 1 to 1.2 mm clearance (1.5mm on Ducati’s and other big twins) and the standard plates and will do just fine for most riders in most situations. All these comments should be read in conjunction with the fitting instructions included with your clutch.

If you want more information on setup, including the latest information we have on racing settings check out the race setup page in the slipper clutch section of our website http://www.sigmaperformance.com

13) Check the clearance between the pressure plate and clutch drum in the pressure plates hole. The correct clearance is about 1,0 mm. If the clearance is smaller than 0.8 mm you will need to check all the friction plates are within specification. You can use different thickness steel plates as shims to reach correct clearance.
Thickness Yamaha Catalogue No.
1.6mm 168 – 16325 - 00
2.0mm 3J2 – 16324 - 00
2.3mm 168 – 16324 - 00
laughter is the best medicine

cobbadiggabuddyblooo
Site Sponsor
Posts: 6809
Joined: Thu Aug 28, 2008 9:19 am
Location: Brisbane,Australia

Re: What did you do today? Cobba's rebuild

Post by cobbadiggabuddyblooo » Tue Nov 18, 2014 12:27 pm

Time for a change of tyres and finally went and fitted the Michelin Pilot Pures I've had sitting at The MC tyre warehouse for a few weeks.
They have stopped production on these and I was lucky enough to get the last pair of 120/70 - 180/55 Good score for $370 fitted.
I've had the front Dymag sitting there for months now too so finally got around to fitting that.
Image
The bonus here being the previous front Magnesium rim was from a xjr1300 and the hub width is wider so I needed to take 2.5mm from each calliper to get it to fit.
Out with the old in with the new.. This rim is acually 1/2 kg lighter than the Dymag and worked a treat.
Image

When I first put on the R1 front end with the axle mod and std TRX rim, I had to place a 2mm spacer between the calliper and fork mount so now I have a 4.5mm gap with the 2.5mm shaved from the calliper and enough to make a flat adaptor to increase rotor size to 320mm.

Image

Image

Lucky for me Nigel and the tyre warehouse are 1 suburb away from John who was making the copper head gasket for me.
Another old dog who's been doing this for a number of years and now just works from home and produces nothing but custom made gaskets.

Image
Annealed and ready to fit into place and tomorrow I'll keep Rod distracted and while he isn't looking , go and place the barrels in his dishwasher.. 8)
They need to be thoroughly washed in hot soapy water to clean any metal still wedged into the honing.
Once I have the pistons on the rods and barrels inplace I need to do a dry run and check clearances.
If all good I'll dial in the cams next so now the fun begins once again and as I have learnt, slow and steady wins the race.
laughter is the best medicine

cobbadiggabuddyblooo
Site Sponsor
Posts: 6809
Joined: Thu Aug 28, 2008 9:19 am
Location: Brisbane,Australia

Re: What did you do today? Cobba's rebuild

Post by cobbadiggabuddyblooo » Wed Nov 19, 2014 7:35 am

First opinion on the michelin pilot pures..
Bike feels even lighter without sacrificing higher speed stability. 8) 8)
Turn in is faster than the std pilot powers and I found I worked the pilot powers to 85-90% of their full potential most times when pushing things.
I feel a little more confident with the pilot pures so I can see these toe sliders won't last long.. :D :D
laughter is the best medicine

User avatar
Killerwhale
Site Sponsor
Posts: 3797
Joined: Tue Aug 22, 2006 8:41 am
Location: GBG/Sweden
Contact:

Re: What did you do today? Cobba's rebuild

Post by Killerwhale » Wed Nov 19, 2014 8:13 pm

cobbadiggabuddyblooo wrote:First opinion on the michelin pilot pures..
Bike feels even lighter without sacrificing higher speed stability. 8) 8)
Turn in is faster than the std pilot powers and I found I worked the pilot powers to 85-90% of their full potential most times when pushing things.
I feel a little more confident with the pilot pures so I can see these toe sliders won't last long.. :D :D
Both SMC & CSS has released a warning about the pures on track when cold. They saw a lot of bikes skid off so everyone using pures where told to do an extra warm up lap. Also not the best wet grip.

cobbadiggabuddyblooo
Site Sponsor
Posts: 6809
Joined: Thu Aug 28, 2008 9:19 am
Location: Brisbane,Australia

Re: What did you do today? Cobba's rebuild

Post by cobbadiggabuddyblooo » Thu Nov 20, 2014 12:36 am

Thanks for the heads up on that Killer.
laughter is the best medicine

cobbadiggabuddyblooo
Site Sponsor
Posts: 6809
Joined: Thu Aug 28, 2008 9:19 am
Location: Brisbane,Australia

Re: What did you do today? Cobba's rebuild

Post by cobbadiggabuddyblooo » Thu Nov 20, 2014 10:01 am

Handy info to remember on cleaning the bores after honing..

The most important step is the cylinder wall cleanup. Use a nylon cylinder wash brush or a clean cloth soaked in warm soapy water and run up and down the bore. Continue this process while flushing the bore with warm soapy water. The goal is to remove every microscopic particle that is embedded in the cylinder wall grooves.
After extensive scrubbing take a clean white lint free cloth with warm water and wipe up and down the cylinder bore with force. Inspect the cloth, if you see grey on the cloth, and most likely you will, you need to go back and clean the bore again.
Repeat until you see no grey on the white cloth. Once each and every bore is perfectly clean then coat each cylinder with oil to preserve until piston placement. Once again the bores must be clean or you just left lapping compound in your high dollar engine.
laughter is the best medicine

User avatar
Con Rod
Site Sponsor
Posts: 1126
Joined: Wed Nov 16, 2011 11:48 pm
Location: Sydney, Australia

Re: What did you do today? Cobba's rebuild

Post by Con Rod » Fri Nov 21, 2014 1:42 am

Cobba,

You will without doubt have gotten oil into the coolant channels, this is not big deal, but I just mention it so as to avoid an alarm when you look at the coolant after start up. It will make its own way out though, i just had to skim the oil from under the radiator cap as it gathered there over the first 200km or so
Paul

cobbadiggabuddyblooo
Site Sponsor
Posts: 6809
Joined: Thu Aug 28, 2008 9:19 am
Location: Brisbane,Australia

Re: What did you do today? Cobba's rebuild

Post by cobbadiggabuddyblooo » Fri Nov 21, 2014 2:54 am

Cheers Paul, =D>
All these little tips and hints are just what I'm looking for on this thread as a good data base for any future rebuilds by either myself or anyone else who may choose to read this thread. 8)
laughter is the best medicine

User avatar
brockzila
TRX-Enthusiast
Posts: 348
Joined: Mon Feb 18, 2008 2:30 pm

Re: What did you do today? Cobba's rebuild

Post by brockzila » Fri Nov 21, 2014 7:10 am

Yes it is good how detailed this build is. Will be of use to any one rebuilding a Trx motor.
Out of interest How much are the copper gaskets??
Is it Brock friendly???

Post Reply