What did you do today? Cobba's rebuild

General Discussion Forum for TRX Enthusiasts...

Moderators: trixynut, Mincehead, dicky, phuk72, Jak, Kevtrx849

Post Reply
cobbadiggabuddyblooo
Site Sponsor
Posts: 6809
Joined: Thu Aug 28, 2008 9:19 am
Location: Brisbane,Australia

Re: What did you do today? Cobba's rebuild

Post by cobbadiggabuddyblooo » Wed Feb 26, 2014 11:13 am

Another day of tinkering :love4: on those little things that just need a bit of attention to keep things neat and tidy.
The Dynatek DC-3 coils are longer and wider than the std TRX coils so no chance of fitting these in the std mounting brackets attached to the frame. Looking at options on mounting I opted for keeping them in a similar position ,just a little further out from their original position to keep them exposed to a good flow of air to keep them as cool as possible.
So now I'm in the proccess of manufacturing brackets that shall attach to the top radiator mounting points and the fairing side mounting points.
These prototype brackets give you an idea of where they shall be positioned.
Next shall be to look how I can adapt this idea with the fairing brackets and radiator in place and bend up a bracket that can give me the result I'm after with a nice rounded edges and black finish. :-k Maybe keep the bracket shape and just space the coils bolts the reqired distance???
Image
laughter is the best medicine

User avatar
Killerwhale
Site Sponsor
Posts: 3797
Joined: Tue Aug 22, 2006 8:41 am
Location: GBG/Sweden
Contact:

Re: What did you do today? Cobba's rebuild

Post by Killerwhale » Wed Feb 26, 2014 12:10 pm

I put mine on the crossbar under the tank, worked a treat when using pod filters...

cobbadiggabuddyblooo
Site Sponsor
Posts: 6809
Joined: Thu Aug 28, 2008 9:19 am
Location: Brisbane,Australia

Re: What did you do today? Cobba's rebuild

Post by cobbadiggabuddyblooo » Wed Feb 26, 2014 2:00 pm

yes looked at your set up killer when doing a little research on this... looks like there's still plenty of clearance everywhere. I was heading down the same path as you to start but figured I'd try mounting back close to original with the average 30*c temps here..
So if not successful there's always a contingency in the way you've gone :wink: .

Image
laughter is the best medicine

User avatar
Rod.s
Site Sponsor
Posts: 1404
Joined: Sun Apr 25, 2010 11:01 am
Location: Brisbane, Australia

Re: What did you do today? Cobba's rebuild

Post by Rod.s » Wed Feb 26, 2014 11:31 pm

Killerwhale wrote:I put mine on the crossbar under the tank, worked a treat when using pod filters...
How did you earth them, is the earth through the harness?

Image
If it's not made in China, it's a fake!

bagmaker
TRX-Enthusiast
Posts: 342
Joined: Mon Nov 08, 2010 5:29 am
Location: Melbourne Australia

Re: What did you do today? Cobba's rebuild

Post by bagmaker » Thu Feb 27, 2014 2:51 am

I have always wondered if the coils could be replaced by a plug-cap style coil, like R1 use.
there are only 3 types of people in the whole world
those who can count
and those who cannot

User avatar
Killerwhale
Site Sponsor
Posts: 3797
Joined: Tue Aug 22, 2006 8:41 am
Location: GBG/Sweden
Contact:

Re: What did you do today? Cobba's rebuild

Post by Killerwhale » Thu Feb 27, 2014 4:10 am

The earths are screwed in at the ends of coils....

User avatar
johno440
Site Sponsor
Posts: 99
Joined: Thu Dec 02, 2010 2:44 am
Location: Brisbane, Australia

Re: What did you do today? Cobba's rebuild

Post by johno440 » Fri Feb 28, 2014 2:01 am

bagmaker wrote:I have always wondered if the coils could be replaced by a plug-cap style coil, like R1 use.
Without sidetracking Cobba's thread, I have looked into this. Takai Racing can do a custom setup which is direct plug & play - two coils and fully assembled adaptor harness but not cheap at $429.99 US. Also dunno if would fit under or foul on the tank (need 3 inches above wire seal to fit the ignition coil). I'm running the engine in an off-road racing buggy so don't have this issue. Their quoted gains are +1-2 HP & +1-2 torque per cylinder.

Cobba how's the head coming along? I mean the bike head.... [-X

cobbadiggabuddyblooo
Site Sponsor
Posts: 6809
Joined: Thu Aug 28, 2008 9:19 am
Location: Brisbane,Australia

Re: What did you do today? Cobba's rebuild

Post by cobbadiggabuddyblooo » Fri Feb 28, 2014 3:02 pm

Hey John good to hear from you...
The head :x :x :x :x dropped the head off 8 months ago and still not completed.. Valves are inplace but waiting for flow work
I've got to chase him up next week because I want it either finished or returned...
I scored the dynetek coils + shipping and by the time I purchase leads I'll have change from $200 Aust.
1 or 2 hp plus gains in torque are not hard to find with a stronger well timed spark, but it's where you find that gain.
Ultimately it may not be at the top end but under load and lower/mid range this is easy with decent coils and leads.

Timing a good/fuel air ratio will easily find the same gains again so a prog. ignition and Dynatek coils will cost around the same price as the Takia racing coil setup alone at around $470 (429 U.S.)
And with your buggy, you'll need those gains in the lower midrange :wink:
Hope all the projects are coming along well.
Last time we spoke you put the trx motor on hold while you completed another motor.
Boys and their toys hey :lol: :lol:
laughter is the best medicine

cobbadiggabuddyblooo
Site Sponsor
Posts: 6809
Joined: Thu Aug 28, 2008 9:19 am
Location: Brisbane,Australia

Re: What did you do today? Cobba's rebuild

Post by cobbadiggabuddyblooo » Thu Apr 24, 2014 1:24 pm

Bit of an update on the rebuild.. Still bloody waiting or the head as it's spose to be finished this week.. :x 
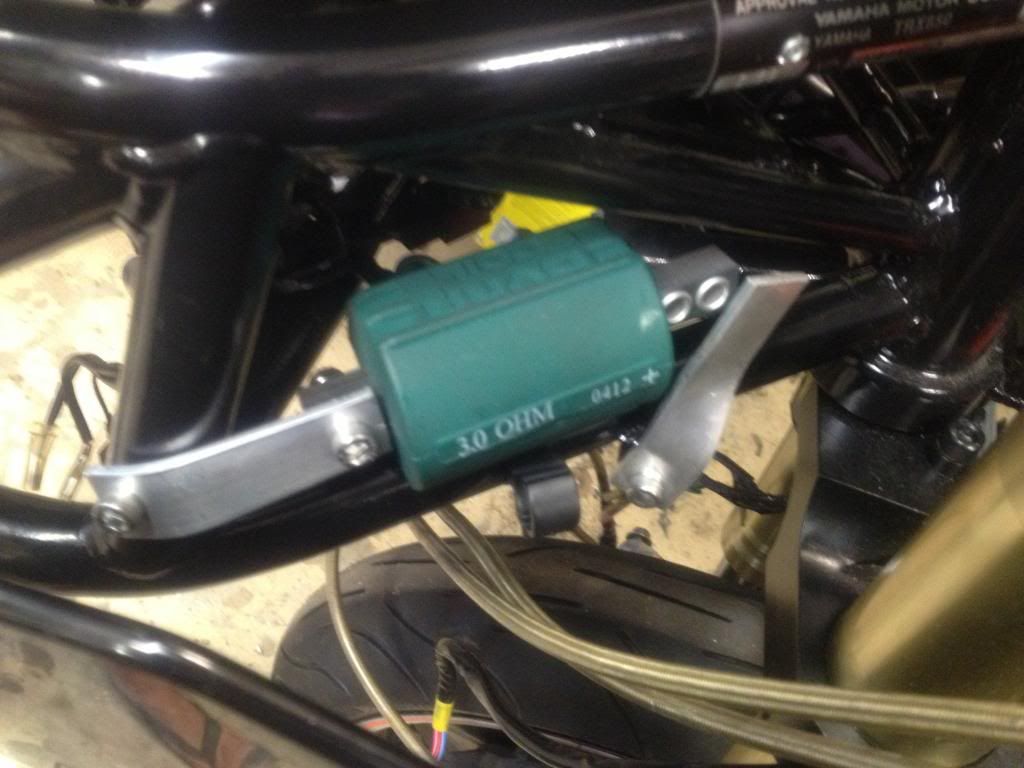
But it gave me a chance to finish off wiring in the ignition so all the electrics should be finished.. :) 
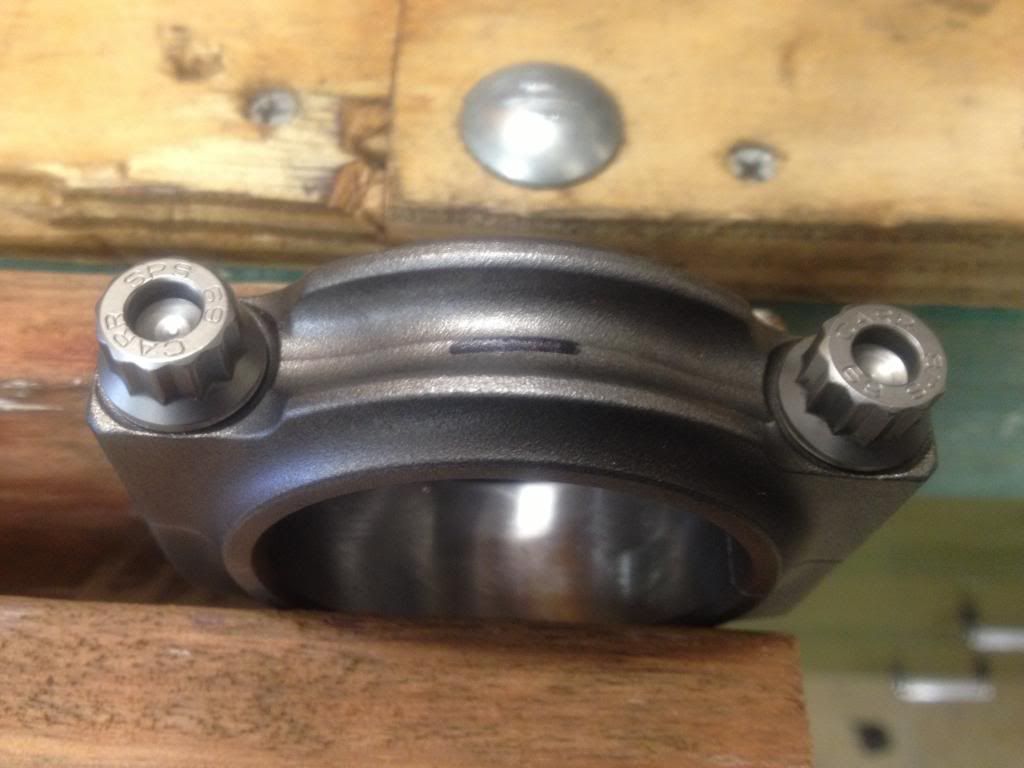
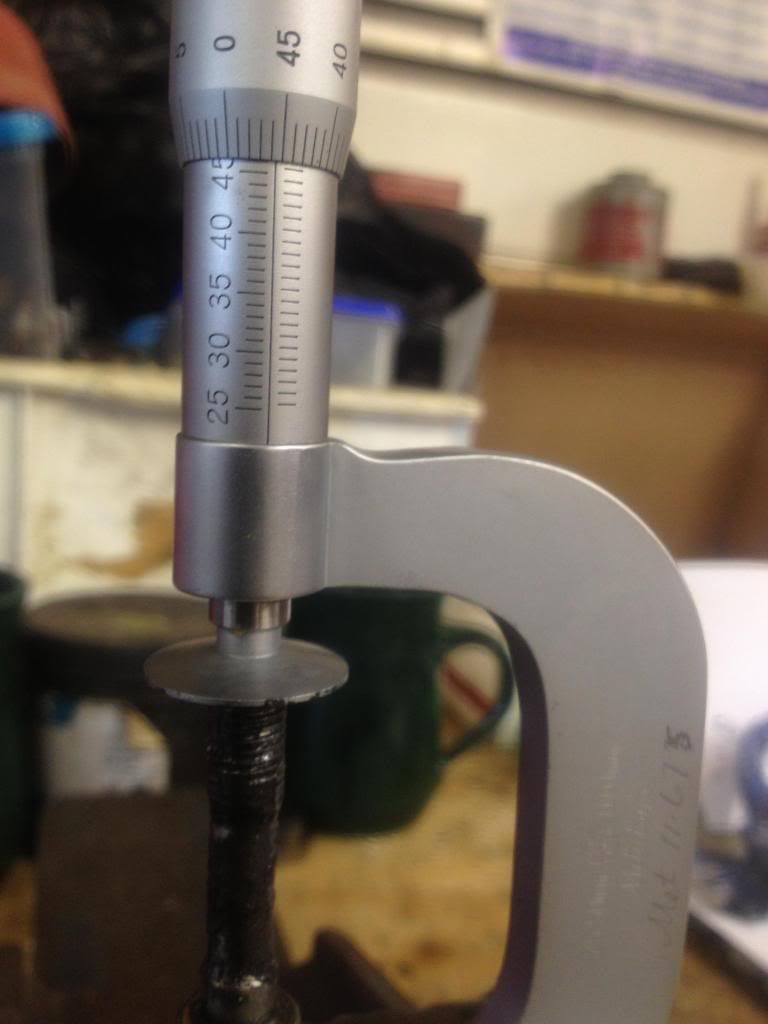
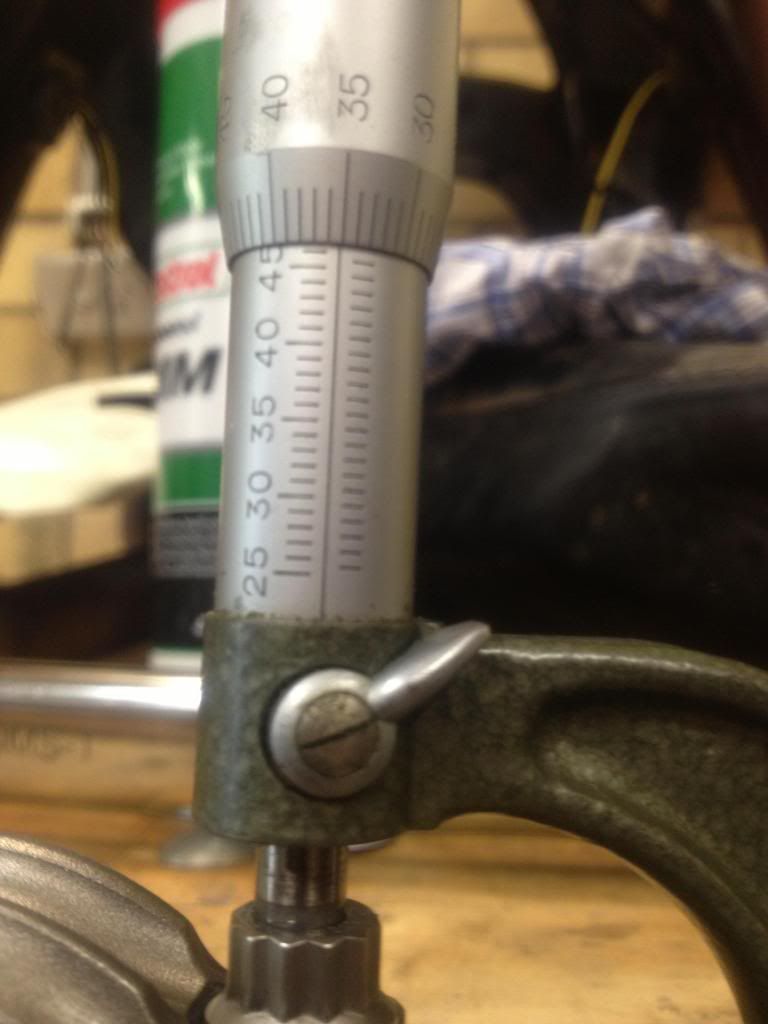
The Carrozzeria magnesium 5 spoke front wheel from a xjr1200 has been fitted inplace but with the extra 5mm hub width, I needed to make a few changes as the discs sat hard up against the caliper so 1.5 mm off each of the calipers will get me back to centre.
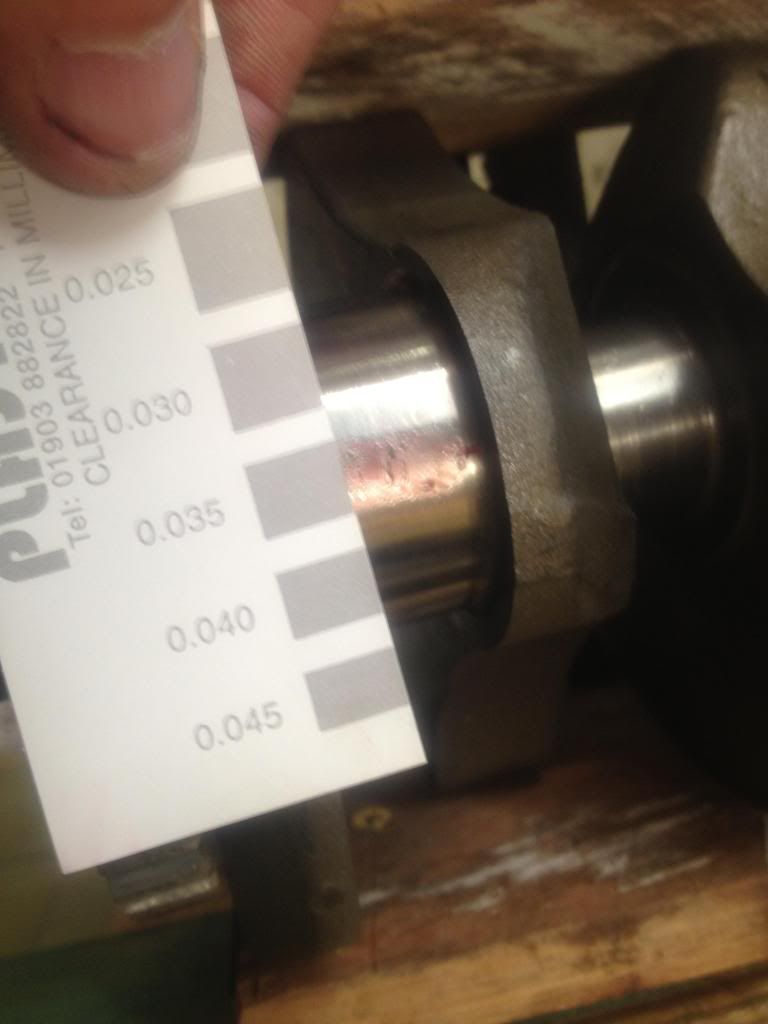
Then a quick look with the new wavey discs bolted on instead of the std I came across another discrepancy.
9.5mm offset on a std disc but a std disc is 4mm thick. The wavey discs where 5mm thick giving me a 10.5mm offset so I settled on 2.5mm being machined off each caliper on their mounting points. I was lucky with the front end set up with the std wheel in place I had to have the front caliper shimmed with a 1mm washer so now I have a good scope to play with on tolerances and centering the caliper to which ever disc offset is fitted.
As for weights .. std rim with a 120/70 pilot power fitted came in at 9.4 kg (bearings & no discs)
Mag rim with a 120/70 Dunlop Q2 fitted came in at 7.3 kg (bearings & no discs)
With the q2 being .2kg heavier tyre on the mag wheel, I'll have shed 2.3kg from the front wheel with a common tyre being the Michelin.
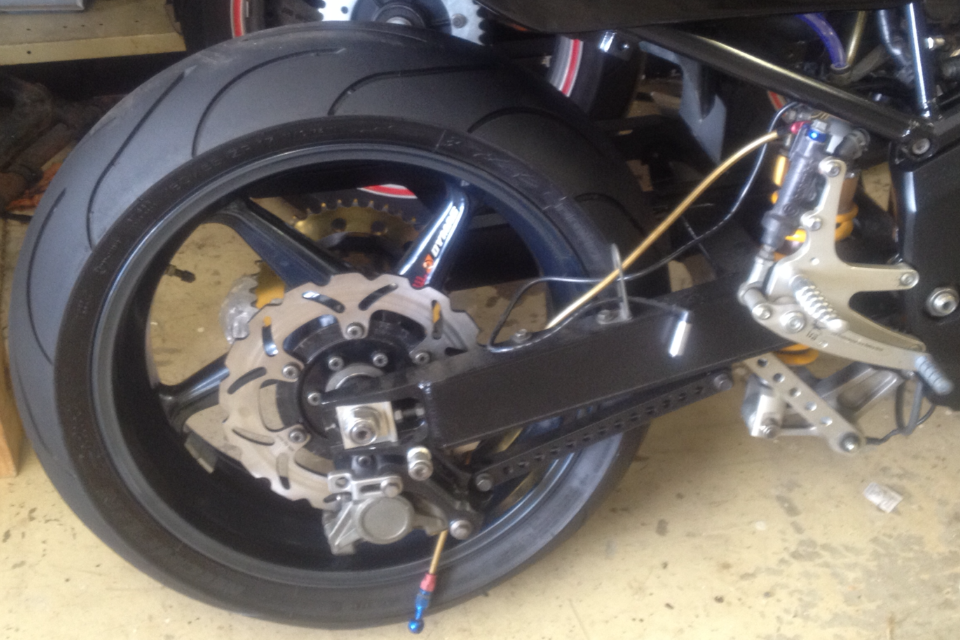
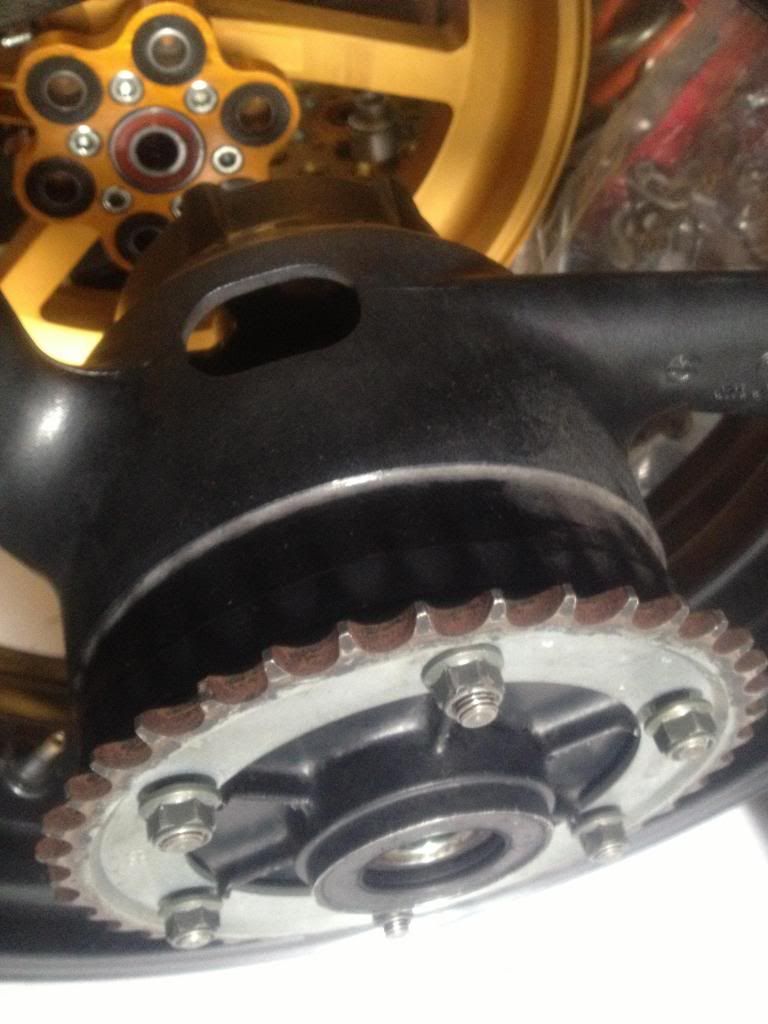
And as for the rear, I have a 5 spoke Dymag which I started fitting up today. It came straight off a TRX, but my first task is to replace all wheel bearings and I've contacted Dymag and I'm waiting for all the torque settings and wheel history via the serial number.
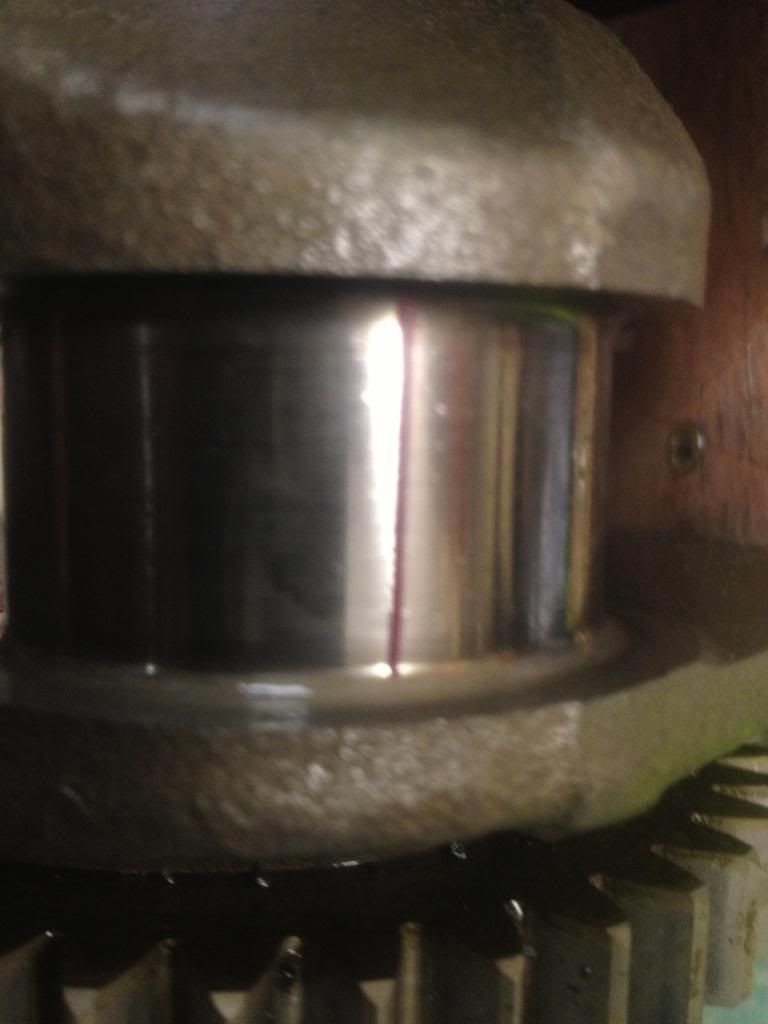
The previous owner had overtightened the rear axle and what this does is presses the bearings against the crush tube in the centre of the rim and effectively seizes the bearing centre from spinning.
I was lucky in the respect the bike had very little Km's on it and sat most of it's life being pampered and the pilot power had very little if any wear.
But first lesson with lightweight wheels, only torque your axle to 1/2 spec so this does not become an issue.
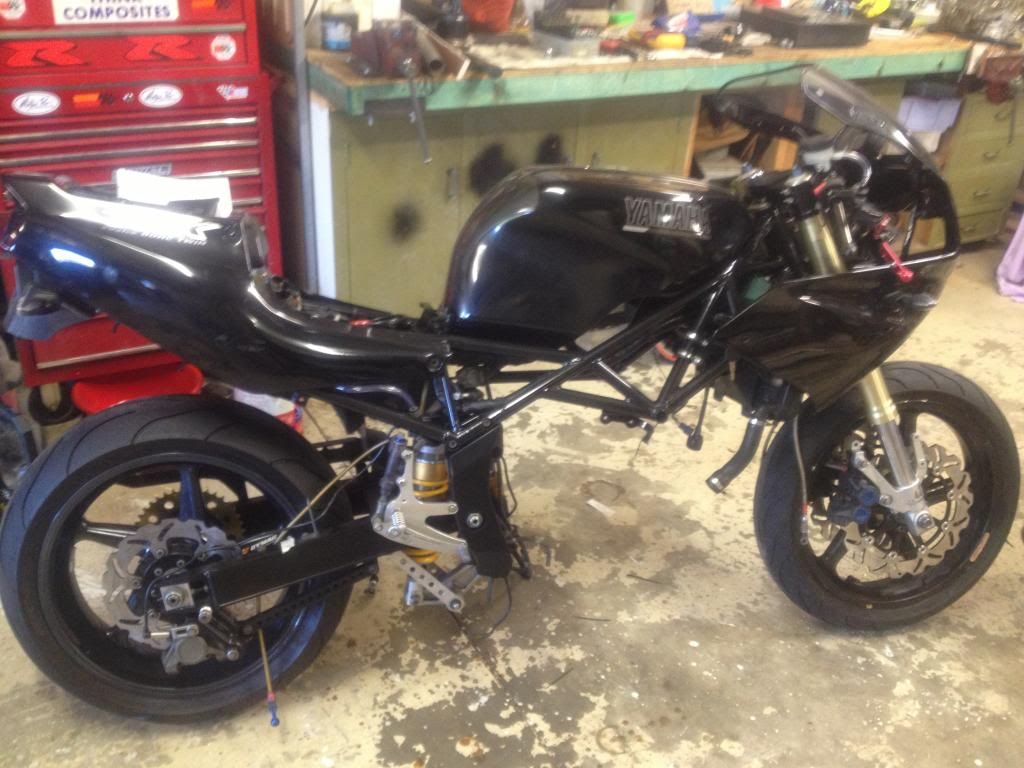
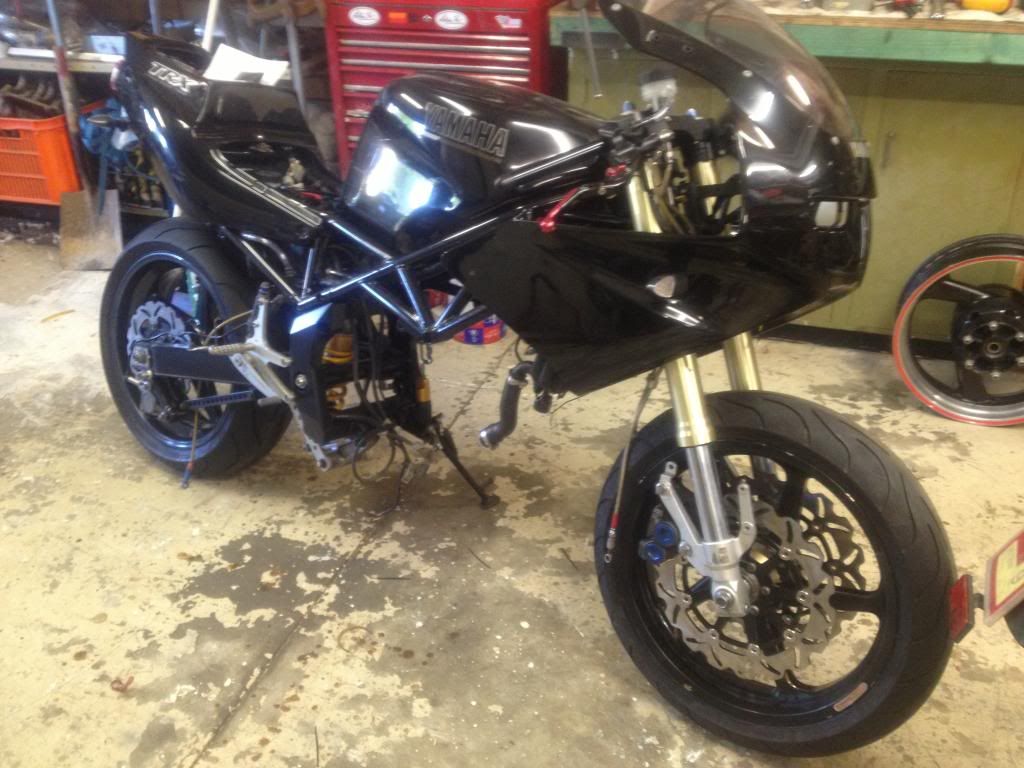
And after all my tinkering today, I forgot to take a photo of the bike with new wheels fitted #-o
I found myself an R6 throttle tube and body too for a quick action throttle set up and fitted that and all works fine with the TRX / FCR cable length.
The R6 has a 60* throttle and the TRX / R1 use a a 76* from memory.

So I'll settle on the mag wheels for the TRX as I figure about 80% of my riding now will be track related with just the odd ride and riding to and from the track.

I've offloaded the front lightweight forged aluminum Carrozzeria rim but I still have the rear if anyone is interested.
It's the same size and offset as a YZF750 but has a 20mm wheel bearing so an easy fit for a yzf750 rear as it's just a matter of placing a bush in the adjuster plates to reduce down to 20mm and extend through to the swing arm to slide for adjustment and using a 20mm axle.
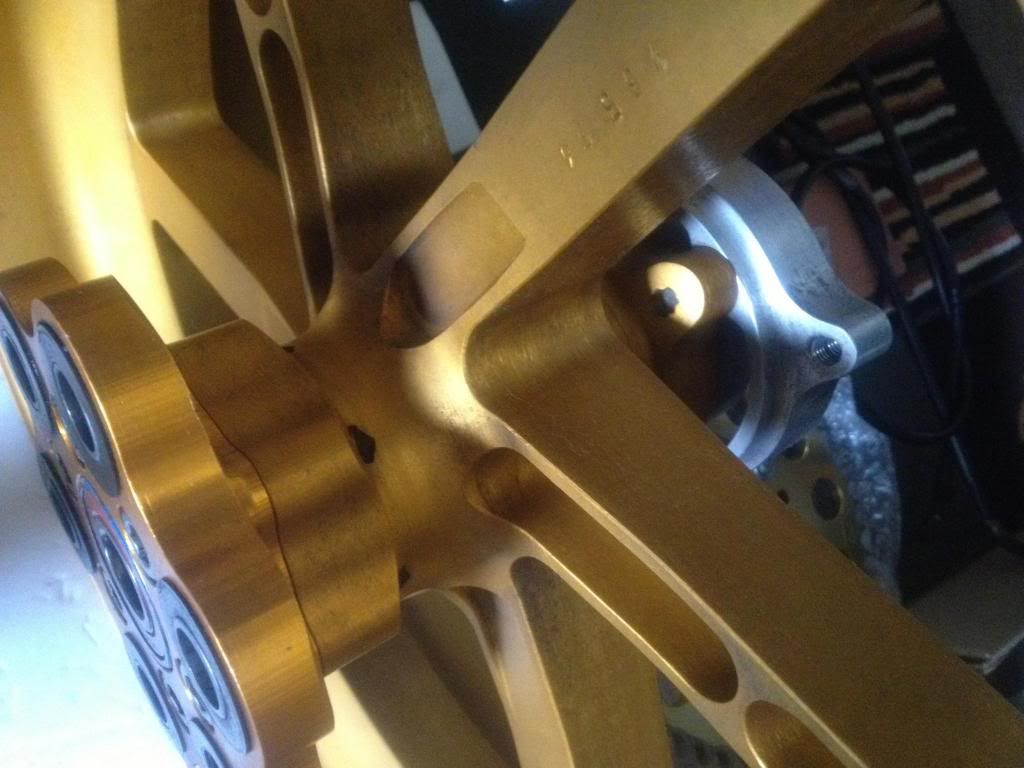
If fitting to the trx swing arm all that is needed to do is machine 5mm off the inside of the cush drive carrier and with this design it is an easy mod as can be seen by the photos.
This section bolts to the hub itself and then the sprocket carrier slides into the 6 cush drives and is a separate piece again.
This is how they use a generic rim and centre hub and just use different disc and cush drive length bolt on sections for the desired offset needed for the bike to suit.. :wink:
So much easier than modifying the std YZF rim to fit like I first done.
Image

Image

Image

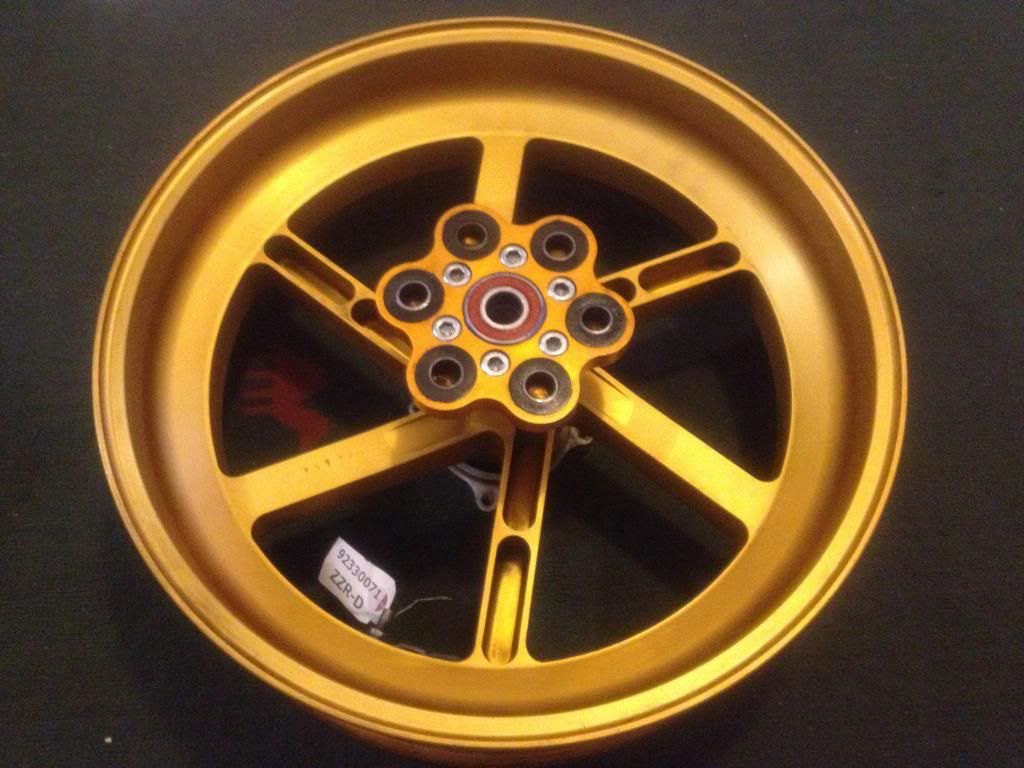
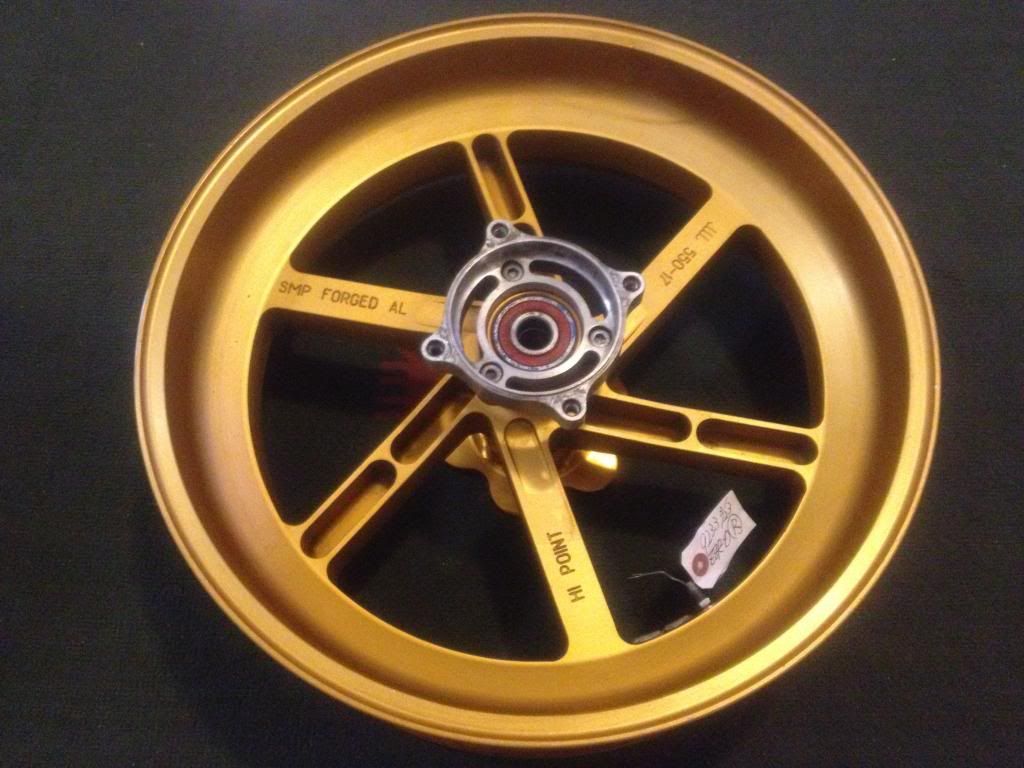
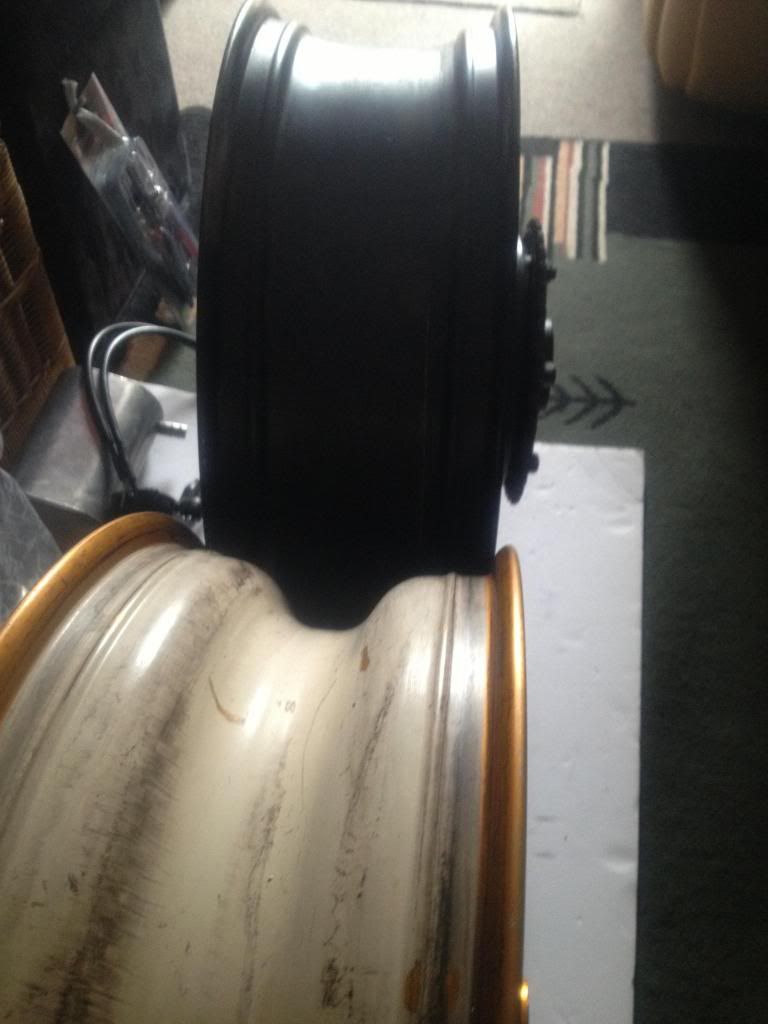
Here are a couple of photos I took with the rim sitting against the std YZF750 rim for a comparison.
You can see the extra weight with the massive hub section on the std rim and the deeper dish for strength and to keep the weight of the rim closer to the centre.

Weight wise the YZF rim with cush drive ,sprocket , bearings etc in place with no disc weighed 9.1 KG and the Carrozzeria forged aluminum came in at at 7.1kg with the bearings, sprocket and carrier with no disc so the same setup as the yzf wheel.
The sprocket on the lightweight rim is a 530 and a full plate so it would be easy to shed 1/2 KG + with a set up like the std sprocket or even more by a lightweight steel sprocket set up as I had on the original TRX rim from The Chain gang.

Image

Image

Anzac day tomorrow so another long weekend hen back to the rebuild come Monday with a few more pics and updates.

LEST WE FORGET
laughter is the best medicine

cobbadiggabuddyblooo
Site Sponsor
Posts: 6809
Joined: Thu Aug 28, 2008 9:19 am
Location: Brisbane,Australia

Re: What did you do today? Cobba's rebuild

Post by cobbadiggabuddyblooo » Tue Apr 29, 2014 12:33 pm

Image

Back today to do a little more to the bike and took a happy snap of the back wheel in place.
Best thing about this rebuild is I have Rod's TRX850 beside me as a reference on things.. 8)
Double checked the measurements to centre of the rim from the swing arm and came within 1mm tolerance on measurements so I'm happy with that .

So many tasks on this rebuild have been made so easy by having the correct tool for the job and I found these telescoping gauges so handy in a number of situations . A worthy addition in anyones tool kit in my eyes. Finding the correct clearance when setting up the front wheel was a breeze to get the correct sizing for wheel spacers and disc /caliper measurements.
Image


Next task at hand was to look at the Carrillo rods and Unlike the std TRX850 bolts and nuts the Carrillo's have a thread cut into the rod itself and the bolt screws into this.
All the specs come with the rods on maximum torque to be placed on the bolts and stretch tolerance .
So it's a matter of measuring the bolt

Image

Image

Tomorrow will be focused on bolting the rods to the crank and using plastigauge to see if the bearings purchased for the new OEM yamaha rods I also have will be within the tolerance when using the new Carrillo rods I'm using now.
So I'm about to experience the challenge Brett has just gone through on his rebuild on how to use this fandangled thin piece of plastic squashed between the bearings and crank to find a clearance measurement.
A special thanks to Rod once again for his patience and guidance with me as I bath in the pleasure of my rebuild.
Last edited by cobbadiggabuddyblooo on Sun Mar 13, 2016 12:33 pm, edited 1 time in total.
laughter is the best medicine

cobbadiggabuddyblooo
Site Sponsor
Posts: 6809
Joined: Thu Aug 28, 2008 9:19 am
Location: Brisbane,Australia

Re: What did you do today? Cobba's rebuild

Post by cobbadiggabuddyblooo » Wed Apr 30, 2014 1:31 pm

So lesson learnt today..


Now I know when I contacted Carrillo themselves last night to get a little clarification and I understand when I torqued the bolts up 2 of the 4 come under the .005-.007 thou stretch specified..
Measuring the bolt stretch under load is a far more accurate way than using a torque wrench to eliminate the variables of friction.
So day two and a little practice I found the desired result all the while remembering not to exceed the maximum toque load given by Carrillo. In my case I needed to go just a couple of extra lbs on 2 of the bolts from TRX 35ft/lb spec to get the desired stretch..

So even though I still used a torque wrench I can get exactly the desired amount of stretch on each bolt.


Image

Image
Last edited by cobbadiggabuddyblooo on Sun Mar 13, 2016 12:36 pm, edited 1 time in total.
laughter is the best medicine

cobbadiggabuddyblooo
Site Sponsor
Posts: 6809
Joined: Thu Aug 28, 2008 9:19 am
Location: Brisbane,Australia

Re: What did you do today? Cobba's rebuild

Post by cobbadiggabuddyblooo » Fri May 02, 2014 8:36 am

This arvo was spent getting out the plastigauge , rods and bearings and learning on how to measure the clearance on the big end bearings.
First job was to set myself up with securing the crank in between two pieces of timber in the vice but allowing access to place the rod from underneath onto the bearing surface of the crank so I may place the cap onto it and torque it down.
Image

Image

It's pretty fiddly stuff plastigauge, so fine and small so I used a stanley knife blade to pry apart a piece and cut to length and place it on the crank bearing surface. Just touching a tiny offcut and it just melted and squashed with no pressure and it may have just been the heat from my hands dissolving it straight away to a sticky paste.

Image

Image

So time to ponder on how to attack this next challenge before me..

Image
laughter is the best medicine

cobbadiggabuddyblooo
Site Sponsor
Posts: 6809
Joined: Thu Aug 28, 2008 9:19 am
Location: Brisbane,Australia

Re: What did you do today? Cobba's rebuild

Post by cobbadiggabuddyblooo » Fri May 02, 2014 8:51 am

Well first attempt I found myself pulling my hair out as I just didn't have enough hands to hold the rod from moving on the crank while tightening the cap onto the rod from the top.

Image

Sorry about all the hair on the garage floor Rod but can you give us a hand here to hold the rod Rod:?
Let me wefwase that. Are there any Woderwicks here.
Woderwick, can you hold the wod from spinning while I tighten the bolts please.

Image

Job done and got a pretty good reading with the new green coloured shells I have on the clearances. No.2 cylinder...
0.026- 0.050" is the specs for optimum clearance from the TRX manual so I'm pleased with the result and has me sitting close to 0.035 which puts me just a poofteenth on the tighter side from middle spec .. 8)
With 0.026 being a tight end optimum tolerance and 0.050 being the loose end before looking at possibly going to another colour bearing size once you get past the 0.050".
Brett found out the incriments in the shell sizes and I'm sure they gain 0.025" each colour change.


No.1 cylinder
Came up at just under 0.045" so still within optimum tolerance that your shooting for as the serviceable limit is 0.090" 8)
My bearings ...GREEN 1st & 2nd cylinder so both within spec )0.045'' and 0.035'' respectively

Thanks for this Brett.. :wink:
for reference purposes . :!: :!: :!: optimum clearance 0.026"-0.050" :!: :!: Serviceable limit 0.090"
next size ...Brown + 0.025" larger
...Black + 0.025" ( 0.050 larger than green)


Image
laughter is the best medicine

cobbadiggabuddyblooo
Site Sponsor
Posts: 6809
Joined: Thu Aug 28, 2008 9:19 am
Location: Brisbane,Australia

Re: What did you do today? Cobba's rebuild

Post by cobbadiggabuddyblooo » Tue May 13, 2014 1:01 pm

Finally off to pick up the head tomorrow after 11 mths.. :D :D .
After the initial seating of the 1mm oversize valves into the head and new springs,valve seals and colletts fitted and shimmed to the Kent cams.

When taken for the flowing of the head it was found during valve overlap when both intake and exhaust are open,there was not enough clearance between the valves themselves so they needed to be seated deeper to accommodate this.

The reason being that if I happen to hit a neutral and over rev, the valves tend to float a little and to stop them touching, this clearance is essential.
But not just as simple as it sounds to just cut them in deeper.
This extends the length of the valve stem further towards the cams, so this extra length is now detrimental to the length of the springs.

So the valve springs themselves where shimmed to take up this extra length and once again measured at full compression of the spring to make sure the spring coils themselves have sufficient clearance and don't bind, then shimmed to the correct clearance once again on the cams.
Another 6 hrs of work to add to the bill. :shock:

Before I pick it up tomorrow, the valves will be removed , numbered so the combustion chambers , valves and pistons can be ceramic coated.
But before I can do this, I need to take the crank,rods and pistons to Brisbane Crank Balancing so they can take out a little more from the piston valve cut outs so I have clearance for the larger valves, then he will spin it all up and balance the whole lot to compliment the gains from the flow work done on the head.

Once that is all completed , finally then I can ceramic coat the components and return it to have the valves refitted.
Then I'm ready to start to putting things back together instead of just looking at a mass of motor parts all over Rods benches.. :lol: :lol:

Image

Image

While all this is happening I'll take the rolling chassis to the frame straighteners and make sure all is true,correct and inline. With Rods lathe out of commission for a little maintenance he can't finish manufacturing the wheel spacers.
I'll get the wheel bearings replaced on both wheels while at it too..
I think I'll hand Dave the gold Carrozzeria back wheel too and have him machine the 5mm off from the sprocket side of the bolt on section of the hub so it will slot nicely into the trx swingarm and line up beautifully with spacers made.
Image

Once the frame is back, I'll bolt the motor I'm getting off Kev into the frame to get me mobile and this will also give me a little time to tune in the chassis before adding the rebuilt motor.
With at least 2 mths till the motor is finally rebuilt, at least I may be mobile in 3 to 4 weeks.
I'll post up a couple of photos tomorrow of the parts of the pistons,valves and head to give an idea of how the clearance is on the piston/valve cut outs and again after ceramic coating.
laughter is the best medicine

User avatar
M.V.
Site Sponsor
Posts: 1509
Joined: Sat Jul 04, 2009 3:23 am
Location: Melbourne, Australia

Re: What did you do today? Cobba's rebuild

Post by M.V. » Wed May 14, 2014 3:06 am

It's all coming together mate, good work. You're a patient man! :D

Might have missed it, but what kind of numbers are you aiming for with the engine mods?

Post Reply