What did you do today? Cobba's rebuild

General Discussion Forum for TRX Enthusiasts...

Moderators: trixynut, Mincehead, dicky, phuk72, Jak, Kevtrx849

Post Reply
cobbadiggabuddyblooo
Site Sponsor
Posts: 6809
Joined: Thu Aug 28, 2008 9:19 am
Location: Brisbane,Australia

Re: What did you do today? Cobba's rebuild

Post by cobbadiggabuddyblooo » Thu Dec 18, 2014 1:20 pm

Image

Work bench made up and in the lounge room...perfect I can watch the cricket in the air con... :lol: :lol:
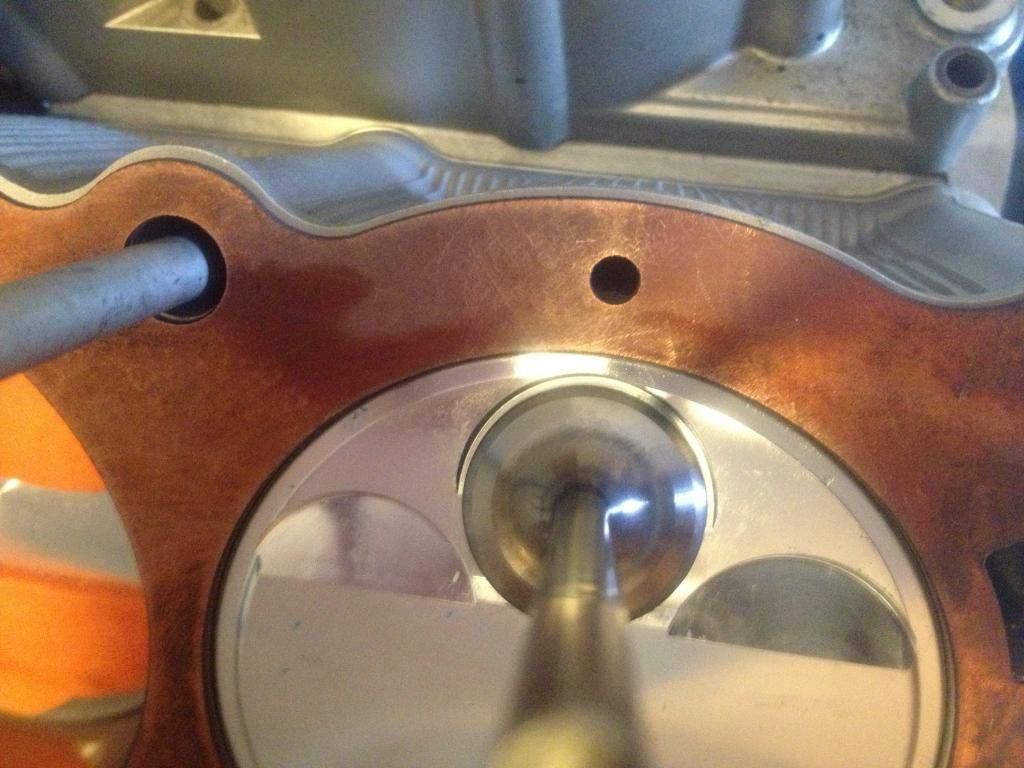
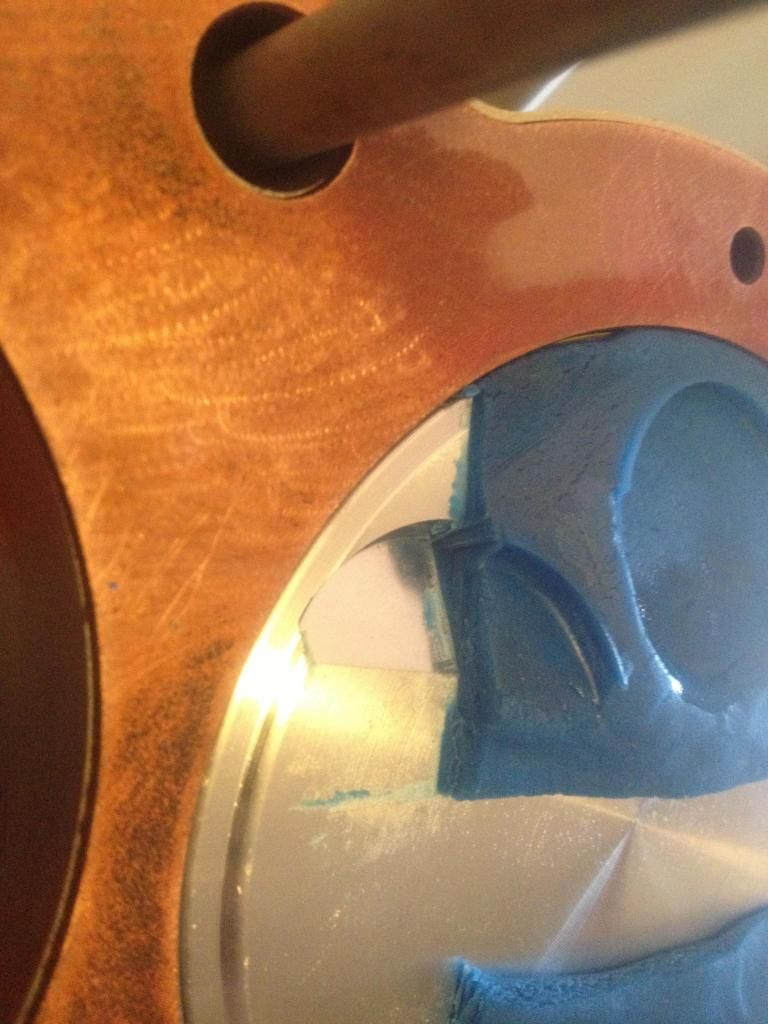
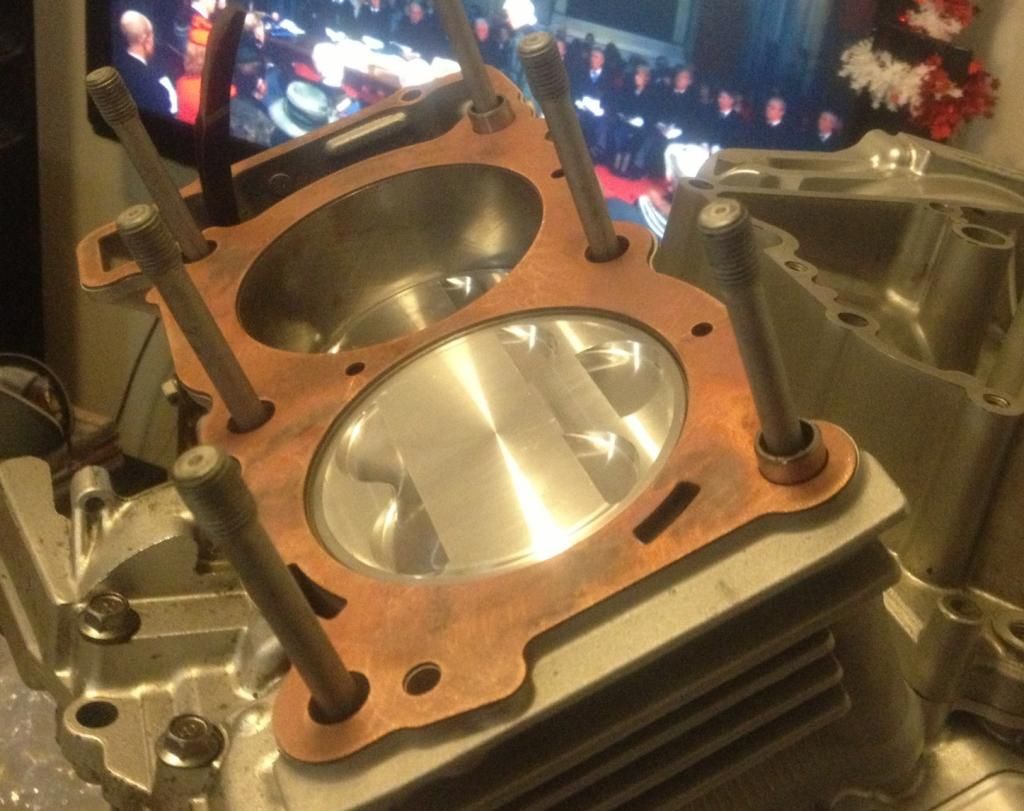
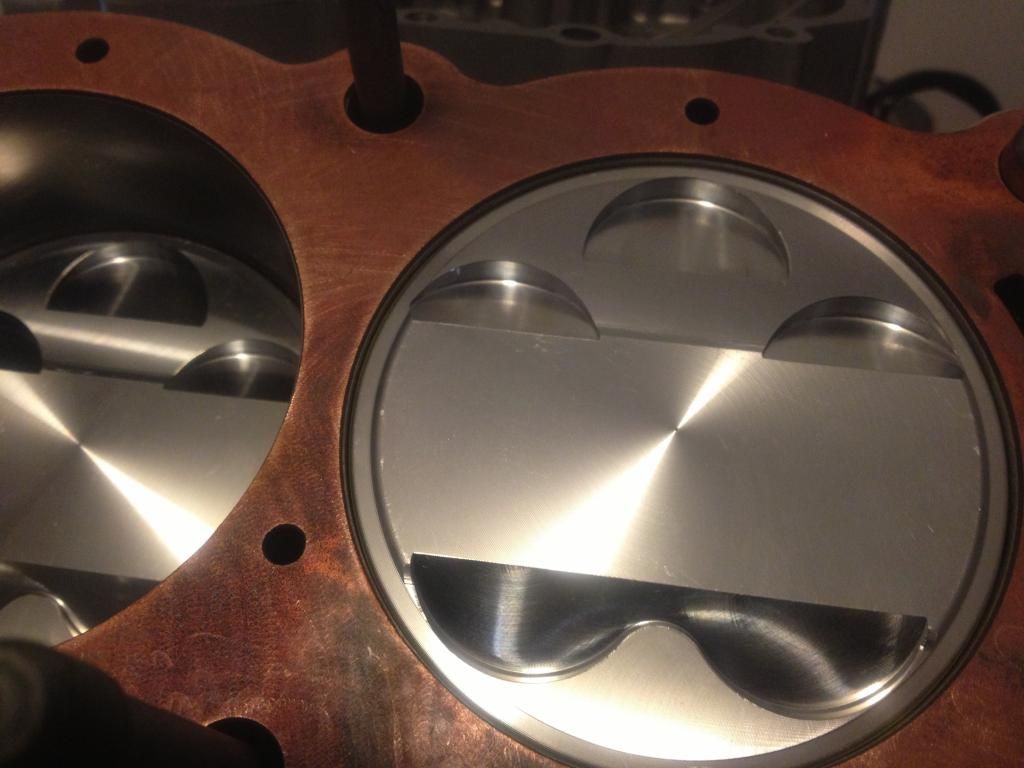
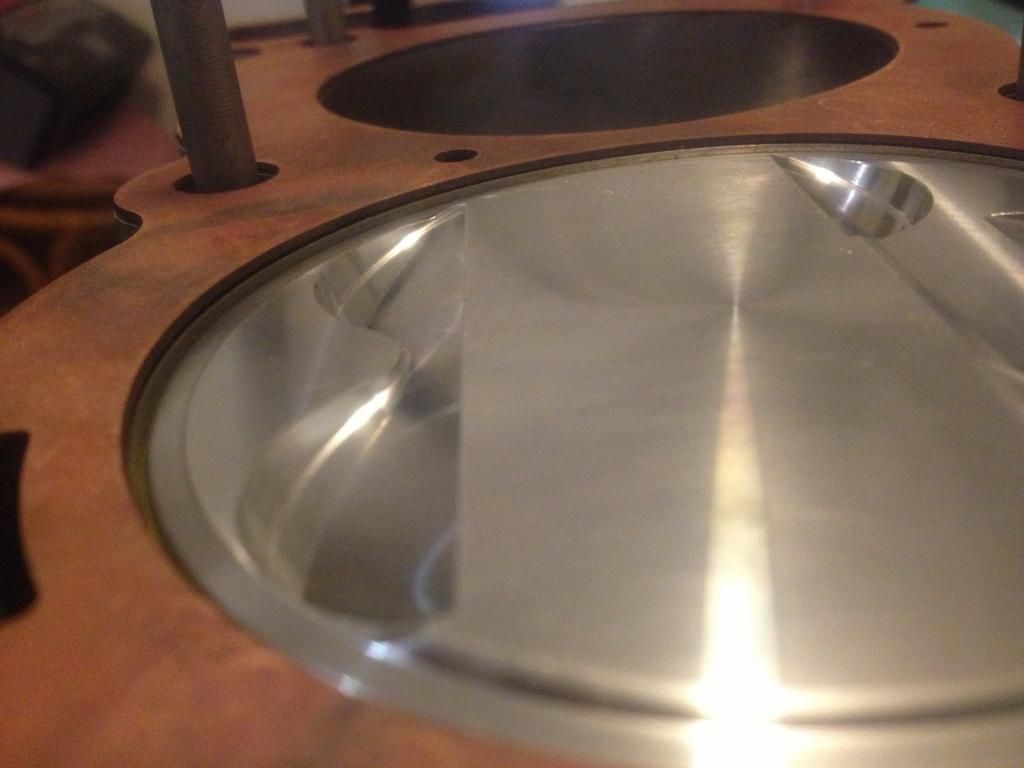
First thing to check with the Arias pistons is the piston deck.
Image
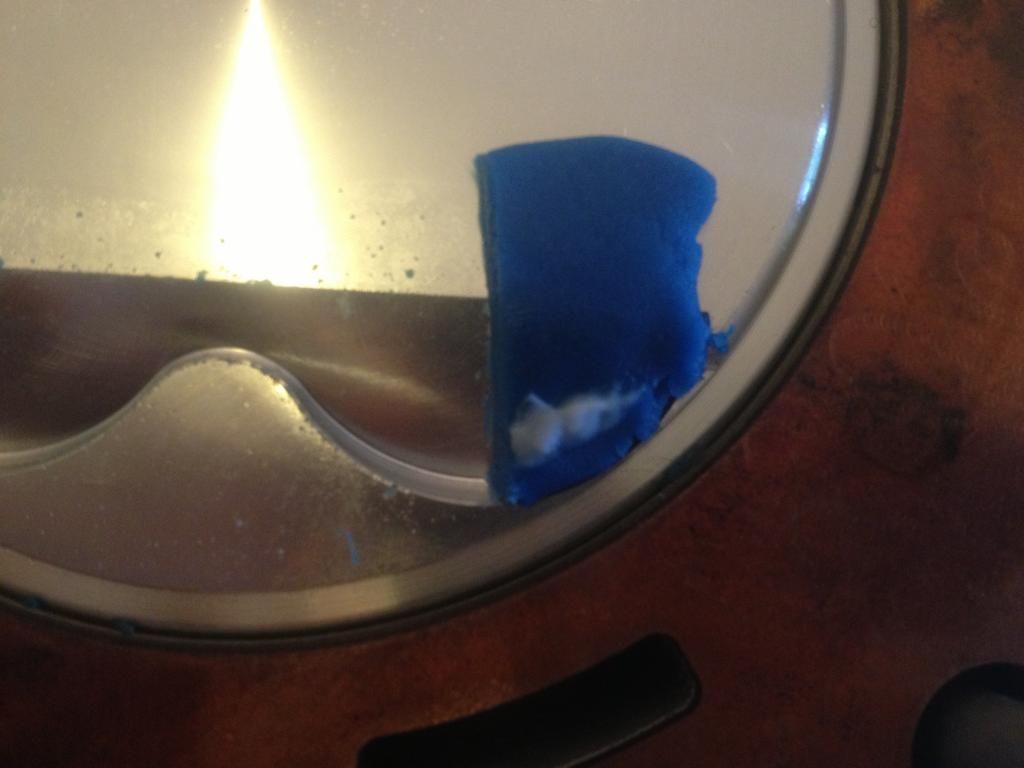
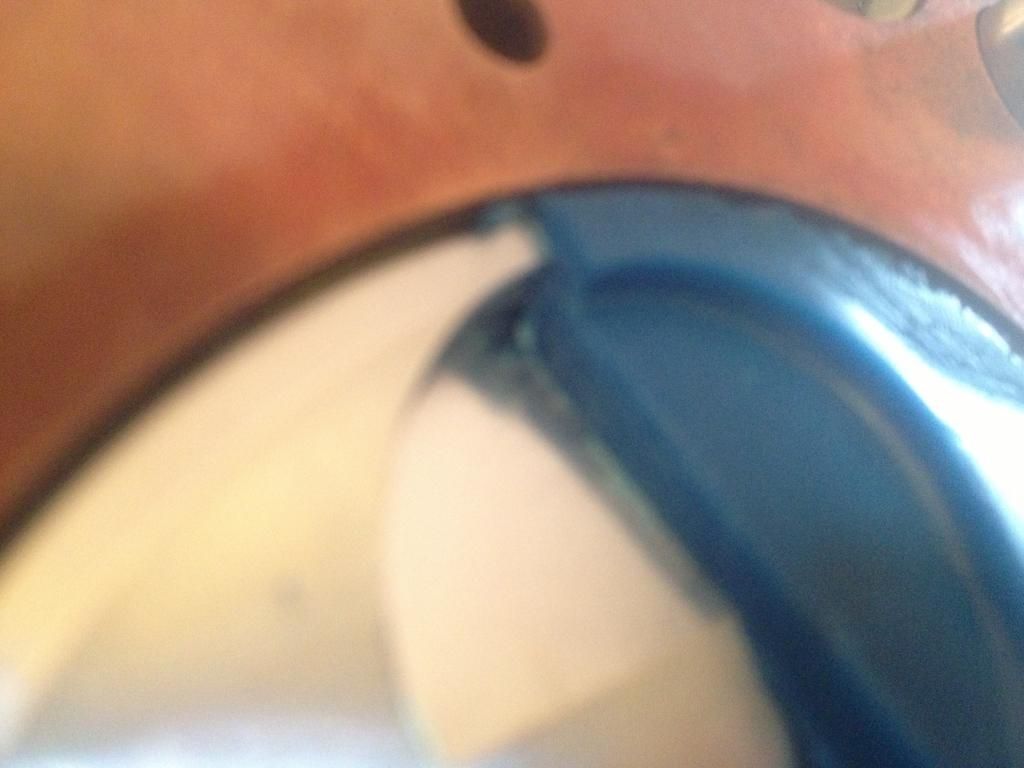
Just with the barrels, base and head gaskets in place I have a 1.55mm clearance and this is using a 0.9mm copper head gasket so I'm feeling confident that once all tensioned down with I'll manage to be above the 0.040" (1mm squish value set by Arias).
Image
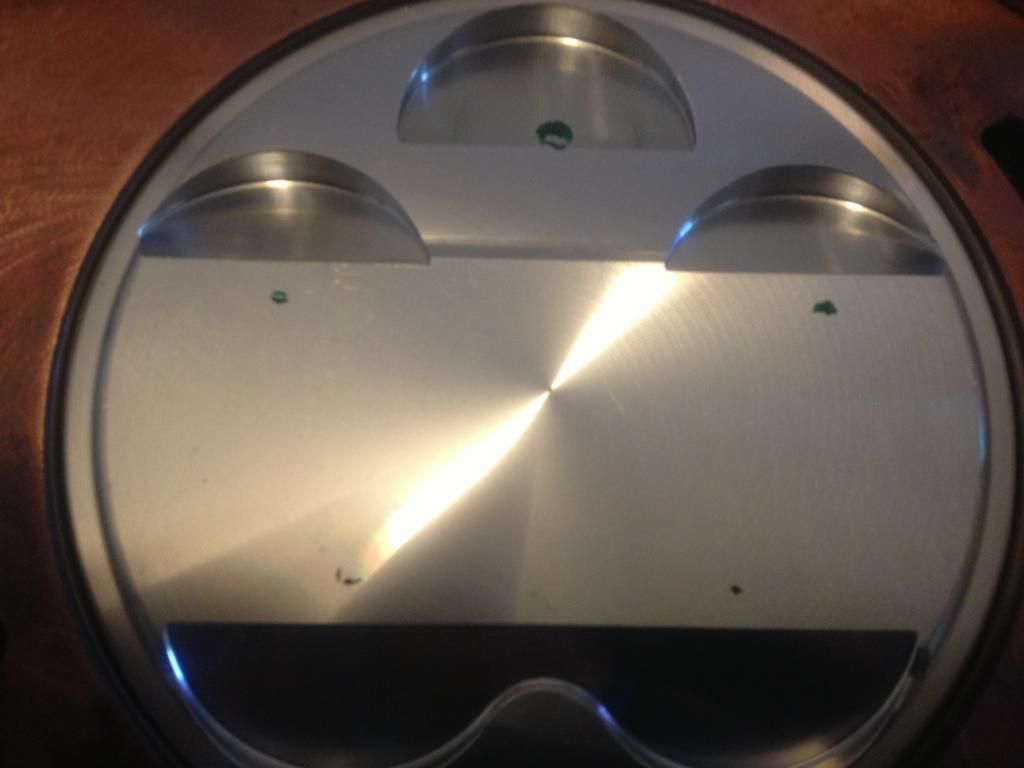
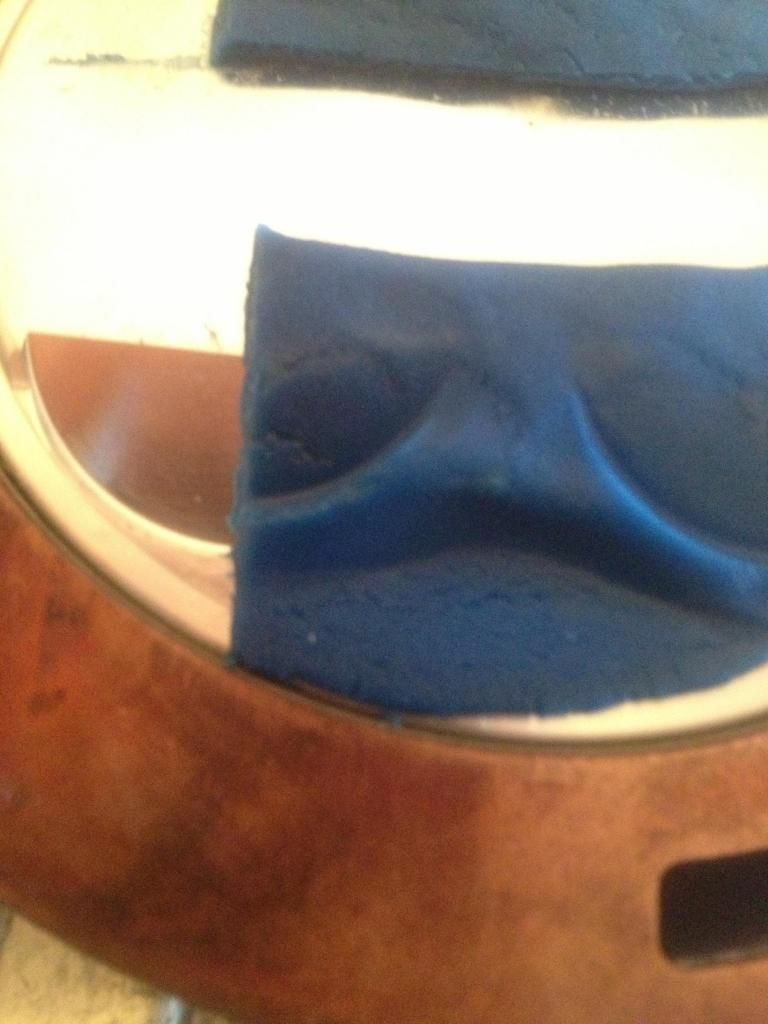
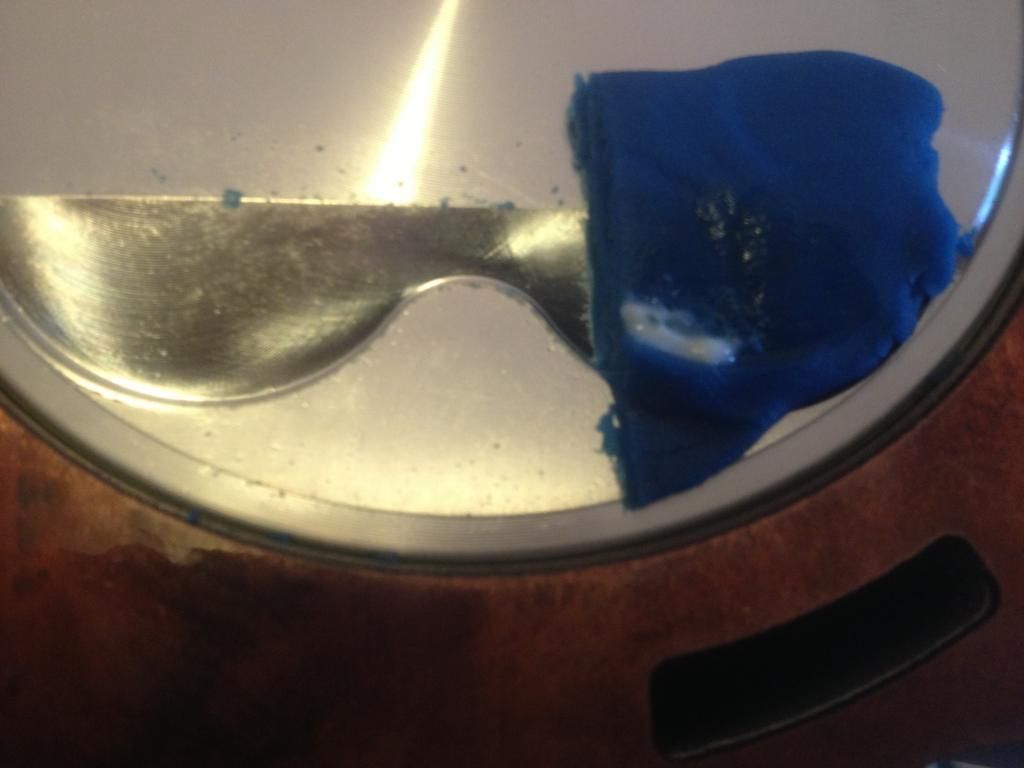
I'll mark the valve relief's tomorrow and check they are central to the valve, then place the my head on, rotate the pistons with clay in place and check the squish with the head tensioned up.
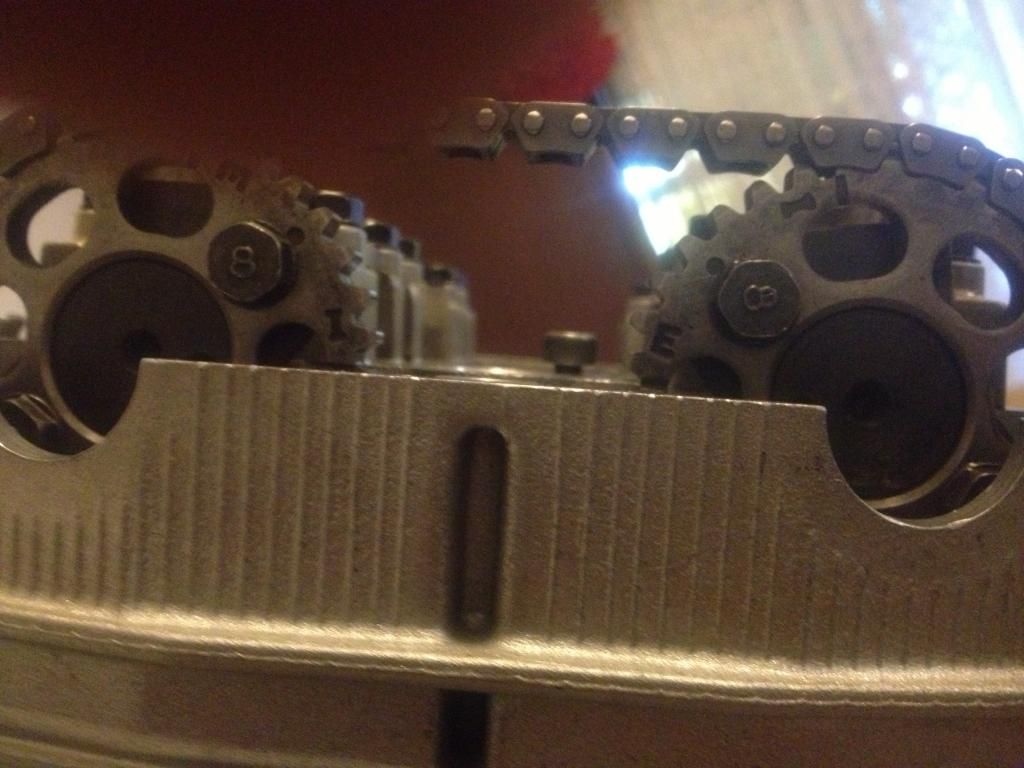
If comfortable, I'll attach the cam chain and gently rotate the crank and check valve clearance and see how things goes.

Image

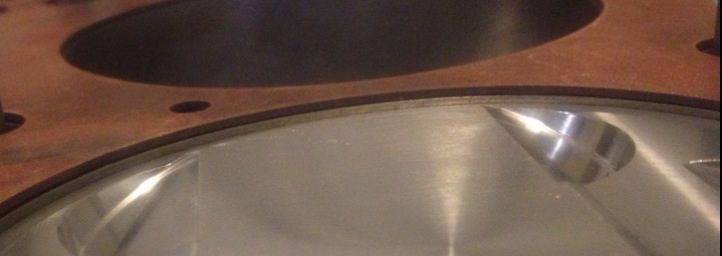
I took the measurement inline with the wrist pin so no rock will corrupt the measurement taken.
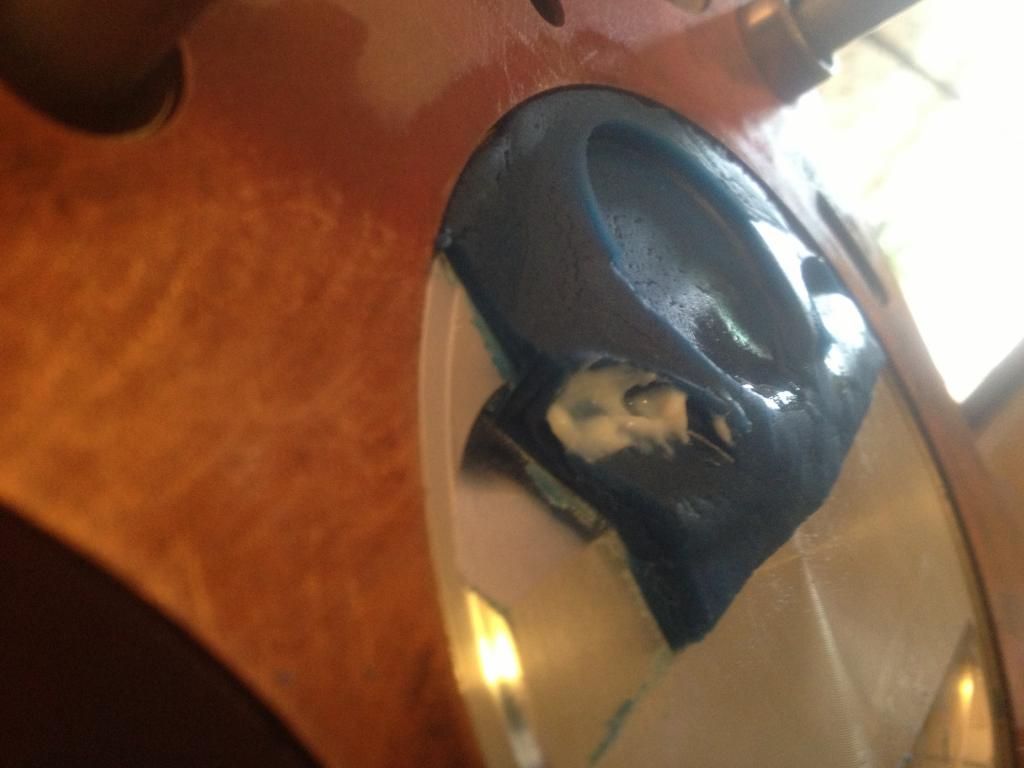
Out of interest I'll take another measurement 90* from the original as a comparison just to see how much the piston movement will effect the measurement..
laughter is the best medicine

cobbadiggabuddyblooo
Site Sponsor
Posts: 6809
Joined: Thu Aug 28, 2008 9:19 am
Location: Brisbane,Australia

Re: What did you do today? Cobba's rebuild

Post by cobbadiggabuddyblooo » Thu Dec 18, 2014 1:39 pm

Con Rod wrote:anyone priced up getting a set made?

Kayla's, while very nice are AU$850, delivered at the moment, ad a decent can and its well over $1000. Given a full Akro system for the MT07 is $850 delivered I should think it might be more economical to get a 2 into 1 made locally.
I had a pair made up a few years ago locally for $650, reved a flowed freely but around 3hp gains so about par with Kaylas.
Specs from Akra give 5.9hp gains at 4000rpm and around 2.4hp at 7500rpm if I remember correctly.
General rule of thumb is longer headers give you more midrange gains..
laughter is the best medicine

cobbadiggabuddyblooo
Site Sponsor
Posts: 6809
Joined: Thu Aug 28, 2008 9:19 am
Location: Brisbane,Australia

Re: What did you do today? Cobba's rebuild

Post by cobbadiggabuddyblooo » Sat Dec 20, 2014 3:03 am

Progressing along and all is looking positive with the Arias pistons.
I placed a 2mm oversize inlet valve into the valve relief to start to get an idea of the sizing.
This is what gave me the initial thought that they may easily accommodate the 1mm oversize valves currently installed in the flowed head.
This link below I found seem to make good sense to me on how to gauge clearance.
http://rehermorrison.com/tech-talk-41-s ... right-way/

This picture below is with a 2mm oversize inlet valve sitting in the relief. 8) 8)
Image

Next step was to place Danny's head on the motor and marked the pistons through the valve guides .
End result gave me even more confidence that the 1mm oversize valves will fit without issues.
Image


Radial check from centre mark 2.2mm at the lowest value.
Play doh in place on top of the piston and time to double check radial clearance.
The head was tensioned down and cam chain attached, I slowly began rotating the crank in an ANTICLOCKWISE direction. and once I had an initial footprint of the valve, not quite to TDC , I pulled it all apart just to check the clearance against the edge of the valve relief. I'm happy with what I saw and I've found 2mm + clearance on the exhaust here too.
Image

Image

Handy things to remember is the way the cam chain adjuster sits as it will bolt in either way.
Their are 2 vertical braces between the bolt hole and the adjuster body, the top one is a little shorter and so just note which way it is on your bike when you remove it. If your note sure, check out the way they hold the adjuster in the manual. :wink:
With the adjuster sitting this way,with the direction of rotation pulling up, this helps the ratchet mechanism lock in on itself.
Image
Last edited by cobbadiggabuddyblooo on Tue Mar 15, 2016 3:23 pm, edited 8 times in total.
laughter is the best medicine

cobbadiggabuddyblooo
Site Sponsor
Posts: 6809
Joined: Thu Aug 28, 2008 9:19 am
Location: Brisbane,Australia

Re: What did you do today? Cobba's rebuild

Post by cobbadiggabuddyblooo » Sat Dec 20, 2014 3:14 am

Image

Another handy hint I found was to use a steel rule square against the engine case face and mark this point as a quick reference point to TDC when rotating the motor without the case in place.

Image

Here is the inlet side with around 2mm clearance these too.

Image

Image

Image
So i feel confident I have the 1.25-1.5mm exhaust/inlet minimum radial clearances covered. (2mm+)
Next step will be to place a thinner layer play doh in the relief's and check at full rotation and how much clearance there is from the valve/piston crown itself.
Next I'll track down a small steel ball to place on the end of the valve stem to check the angle of the relief too .
Last edited by cobbadiggabuddyblooo on Wed Dec 24, 2014 10:51 am, edited 2 times in total.
laughter is the best medicine

cobbadiggabuddyblooo
Site Sponsor
Posts: 6809
Joined: Thu Aug 28, 2008 9:19 am
Location: Brisbane,Australia

Re: What did you do today? Cobba's rebuild

Post by cobbadiggabuddyblooo » Sat Dec 20, 2014 9:50 am

Final test done and found I still have an easy 2mm+2.2mm clearance from the piston crown so I feel that all may be good to with the Arias pistons with the 1mm oversize valves.
Which now means, removing the crank once again and balancing it to the Arias 878 pistons early next year..
But in the mean time over xmas/new years I can dial in the cams.
Image
They seem pretty close just by sighting the cam sprockets so it will be interesting just how far out they are..

I'm sure I'll gain in acceleration using this set up, with the Carrillo rods and Arias pistons, I've shed 82 grams in reciprocating mass on each cylinder compared to the std OEM piston/rod (124grams JE and std OEM rod) so this will give me a what I'm looking for out of the corners.
Last edited by cobbadiggabuddyblooo on Sun Dec 28, 2014 8:47 am, edited 2 times in total.
laughter is the best medicine

User avatar
Rod.s
Site Sponsor
Posts: 1404
Joined: Sun Apr 25, 2010 11:01 am
Location: Brisbane, Australia

Re: What did you do today? Cobba's rebuild

Post by Rod.s » Sat Dec 20, 2014 11:53 am

Well done =D> coming along nicely :D
If it's not made in China, it's a fake!

cobbadiggabuddyblooo
Site Sponsor
Posts: 6809
Joined: Thu Aug 28, 2008 9:19 am
Location: Brisbane,Australia

Re: What did you do today? Cobba's rebuild

Post by cobbadiggabuddyblooo » Fri Dec 26, 2014 1:11 pm

laughter is the best medicine

cobbadiggabuddyblooo
Site Sponsor
Posts: 6809
Joined: Thu Aug 28, 2008 9:19 am
Location: Brisbane,Australia

Re: What did you do today? Cobba's rebuild

Post by cobbadiggabuddyblooo » Sat Dec 27, 2014 7:50 am

Image
Back into the swing of things again and time to fit the front discs and clean up the calipers and pistons.
Disc carrier face clean and same with the mating surface on the front wheel so I nice dry and a little loctite on the bolts.
Silver bolts don't look the best and touched up with a little black nail polish, so I'll track down some more zinc button heads for the discs and paint them black. Why zinc, because zinc is the least reactive to the magnesium wheels.
Image
Callipers took about 4 hrs to clean with a toothbrush and brake fluid. I'd heard of conflicting reports on using brake cleaner due to the chemical nature , it's not the best for the seals and a little elbow grease with the brake fluid brought things up nice and clean.
I used a cable tie to get down in the small gap between the piston and the calliper body on both ends.
Image

I have to agree with what I read about the Yamaha blue/gold spot pistons being notorious for sticky pistons.
6 out of the 8 pistons where sticking and took a while to get them all travelling freely.
One more task completed ... 8)

Image

GOOD READING ON THE TASK WITH PHOTOS ON CLEANING BLUE SPOTS.
http://www.bikesandtravels.com/biker.aspx?ride=156

ADDED NOTE on brake calliper weights

R6 blue 4 pot: 720g
R1 gold 4 pot: 650g
Last edited by cobbadiggabuddyblooo on Sat Dec 27, 2014 3:54 pm, edited 1 time in total.
laughter is the best medicine

Trixed
TRX-Enthusiast
Posts: 341
Joined: Sat Jan 26, 2013 4:07 am
Location: Brisbane Aus

Re: What did you do today? Cobba's rebuild

Post by Trixed » Sat Dec 27, 2014 11:56 am

The cable tie is a good idea! Especially around the cylinder.
It is time to rev your hearts!

cobbadiggabuddyblooo
Site Sponsor
Posts: 6809
Joined: Thu Aug 28, 2008 9:19 am
Location: Brisbane,Australia

Re: What did you do today? Cobba's rebuild

Post by cobbadiggabuddyblooo » Sun Dec 28, 2014 3:45 am

Yes bit of a laborious task though Udaysen, but worth the effort if feel.
I can see this will just have to be a part of the general maintenance done on each oil change to stay on top of the build up of crud.
Weights where interesting though on the gold spots and others have mentioned they tended not to stick as much so less drag so this may be a good option too..
Image

Breather check valve arrived so the next little gadget to install over the next week or so.
With the 270* crank pressure variation shouldn't be that much as the pumping action and 270* configuration means they will cancel each other out with one chasing the other by 90* at TDC and BDC.
Here's an insight into the theory.
http://ariel.ucs.unimelb.edu.au/~ben/mt ... crank.html

I'll place the check valve before the catch tank and if I choose to use the added exhaust extraction method I can attach it to the the tail of the muffler as there is already a hole in the exhaust outlet as an option.
laughter is the best medicine

cobbadiggabuddyblooo
Site Sponsor
Posts: 6809
Joined: Thu Aug 28, 2008 9:19 am
Location: Brisbane,Australia

Re: What did you do today? Cobba's rebuild

Post by cobbadiggabuddyblooo » Sun Dec 28, 2014 9:02 am

First thing I decided to check was to see what difference there will be between a new cam chain and the one I removed with 25,000km's on it.

So here was my base point with the new cam chain at TDC.. The cam chain adjuster was 7 clicks out with a new chain.

Image

Image

Next photo is with the 25,000 Km cam chain.. This chain was 10 clicks out on the adjuster. This pulled the crank around by 2.5 degrees with a timing wheel on the crank.. You can see the cam timing has shifted about the thickness of the timing line mark when back at TDC.
The photo angles don't really do it justice but it is noticeable when viewing with the naked eye.
2.5 degrees at the crank with the cams travelling on a 2:1 ratio that"s 1.25* retarded cam timing after 25,000km on an OEM Yamaha cam chain.

Correct me if I'm wrong but from what I've learnt so far I feel...
Retarding the cam timing will rob you of lower and midrange power which may be more noticeable than the slight increase in top end power you will gain with retarded cam timing.
laughter is the best medicine

User avatar
dandywarhol
Site Sponsor
Posts: 1639
Joined: Fri Nov 24, 2006 12:56 pm
Location: Edinburgh, Scotland

Re: What did you do today? Cobba's rebuild

Post by dandywarhol » Sun Dec 28, 2014 12:32 pm

I'm loving this thread Brian :D

I'm finding it a bit difficult to see the scribed lines - maybe a light on the marks would show it better?

It's my understanding that advancing the valve timing will improve mid range performance, not retarding it. Variable valve timing by a variator system (Alfa/Toyota/BMW) only alters the opening/closing times of the valves, not the lift or duration. These car engined systems advance the inlet valve timing around 2000 rpm and retard the timing back to standard around 5000. The advanced intake valve opening gives a larger valve overlap, filling the cylinder better and helping to scavenge the exhaust. The theorists reckon it also cleans up emissions but I can't see that if there's some air/fuel mixture going straight out the exhaust valve #-o
1996 TRX 850, blue, Ohlins 46HRCLS, Race Tech Gold Valves, 0.90 springs, Venom pipes, R6 brakes............
1974 Yamaha RD250A, Candy Blue
1998 Yamaha SZR660, blue of course
1967 Yamaha TD1C 250, Blue and white

User avatar
Rod.s
Site Sponsor
Posts: 1404
Joined: Sun Apr 25, 2010 11:01 am
Location: Brisbane, Australia

Re: What did you do today? Cobba's rebuild

Post by Rod.s » Mon Dec 29, 2014 2:09 am

[quote="dandywarhol"]I'm loving this thread Brian :D

I'm finding it a bit difficult to see the scribed lines - maybe a light on the marks would show it better?

It's my understanding that advancing the valve timing will improve mid range performance, not retarding it. Variable valve timing by a variator system (Alfa/Toyota/BMW) only alters the opening/closing times of the valves, not the lift or duration. These car engined systems advance the inlet valve timing around 2000 rpm and retard the timing back to standard around 5000. The advanced intake valve opening gives a larger valve overlap, filling the cylinder better and helping to scavenge the exhaust. The theorists reckon it also cleans up emissions but I can't see that if there's some air/fuel mixture going straight out the exhaust valve #-o[/quote]

It aligns the exhaust back pulse with the exhaust flow, effectively pushing the last of the fuel rich exhaust gas back into the cylinder. The exhaust back pressure is greater than the inlet pressure and for the small amount of time that the exhaust valve is still open, allows this fuel rich gas to be pushed back, giving a greater burn and effectively lowing all emissions. As the rev's rise the exhaust pulse accelerates and this scavenging slows and then reverses, not good! So the auto advance/retard cam timing changes to then take advantage of the cam profiles :D
If it's not made in China, it's a fake!

User avatar
Rod.s
Site Sponsor
Posts: 1404
Joined: Sun Apr 25, 2010 11:01 am
Location: Brisbane, Australia

Re: What did you do today? Cobba's rebuild

Post by Rod.s » Mon Dec 29, 2014 2:32 am

Just a point…when thinking of the flow of gas in these engines, remember that the gas tumbles (like a wave) in towards the opposite cylinder side, travels down that wall and then deflects off the piston and comes up the inlet side. So this tumbling can push fuel rich gas out the still open exhaust valves, this is why a well designed exhaust will improve burn efficiency as it uses the exhaust pulse to keep the unburnt fuel in the cylinder at low to mid range and flows free at higher RPM's :D

The piston squish accelerates the mixture from the outer piston edge into the centre (central spark plug) where it's ignited. The inward rushing gas is then burnt uniformly and radiates out at a constant speed :D

These flat toped piston design engines, (generally) don't swirl the fuel around like a cyclone, if they did the centre of the piston would be lean (heavy fuel rich gas would spin to the outer edge) this would result in a slow burn/lost energy/hot piston. Imagine, the inner lean gas would burn fast (hot) and the outer slow and cold negating any energy created by the centre burn.

Hope that this makes sense :wink:

Hemi heads have the spark plug on the outer edge to take advantage of the swirl (cyclone) created by the offset inlet/exhaust valves….
Last edited by Rod.s on Mon Dec 29, 2014 8:42 am, edited 1 time in total.
If it's not made in China, it's a fake!

cobbadiggabuddyblooo
Site Sponsor
Posts: 6809
Joined: Thu Aug 28, 2008 9:19 am
Location: Brisbane,Australia

Re: What did you do today? Cobba's rebuild

Post by cobbadiggabuddyblooo » Mon Dec 29, 2014 6:12 am

Yes I see my mistake in interpretation , :roll: the cam is actually retarded back but this in fact this action advances the cam timing.
laughter is the best medicine

Post Reply